![]()
![]()
![]()
![]()

![]()
![]()
![]()
![]()
![]()
![]()
![]()
![]()
![]()
![]()
![]()
- a Windows computer (PTgui has not been ported yet to Macintosh or Linux).
- a working installation of Panorama Tools with PTstitcher (I used version 2.1) : get it here.
- PTgui : get it here.
- a photo-editing program will be useful to crop and rotate your images if necessary.
- a description of the shooting technique, how to crop the images if necessary and parameters optimization strategies.
- a PTgui template file to apply to your own images shot using similar settings.
- a zip file containing a set of ready to stitch images (cropped and rotated when necessary) with PTgui project file with control points, before and after optimization.
- an assembled panorama
- for the sake of completeness, a Zip file containing the original photographs, directly coming from my Coolpix.
- Un-zip the sample file you want to test in the specified directory (if for some reason you can't use this directory, see here).
- Launch PTgui
- Open the script file you want to use (file/open). Three levels of scripts are provided:
- name+cp-opt.pts is the simplest to use (but not very interesting... though it enables you to test your PTgui/PTstitcher setup): you only have to assemble the panorama (in Create Panorama tab, press Create Panorama)
- name+cp.pts: here I provided the control points, but you will have to run the optimizer before stitching (in Optimizer tab, press optimize. The variables to optimize are already selected).
- name.pts: You will have to enter the control points. This file is actually the template you can apply to your own images.
- Launch PTgui
- Import your images (in Source images tab, press Add button then select all your images). Caution: you must name images in alphanumeric order as your camera is rotated clockwise.
- Select template file (name.pts) that best matches shooting method you used. To be able to apply the template, number of images and lens type (rectilinear [normal] or fisheye [full frame or circular]) must be the same.
- Place your control points (in Control points tab). Three control points per image pair should be enough.
- Before running the optimizer, it's a good idea to save your script!
- Run the optimizer and watch carefully the value displayed during the optimization process: it should decrease to a value in the range 0.5 - 3 pixels (if it doesn't, see here). If the process is slow (many images), and the value displayed doesn't decrease significantly anymore, you can press the cancel button to freeze the optimized values at their current state.
- Apply the optimized values.
- You can then verify that everything went OK during the optimizing by checking the optimized horizontal field of view (lens setting tab). Its value should be close to your lens hfov - if not, go here.
Hfov evaluation: Warren Young's F'calc can be handy, or you can use Ken Turkowski javascript angle of view calculator. Note though that none of them apply to fisheye lenses - Now, stitch your panorama (in Create Panorama tab, press Create Panorama). With the template file as I provide it, PTgui will generate a JPEG file with rather low resolution. You can view it as an image, or as a VR scene (simply drag and drop the panorama image on PTviewer for windows or on its shortcut).
PTGui template collection
Joost Nieuwenhuijse has written PTGui, a wonderful front-end program to Helmut Dersch's Panorama Tools that makes panorama stitching easier than it was when I wrote my tutorial.
You will find a good step-by-step guide (read it before this page !) on the use of PTgui by John Houghton at http://homepage.ntlworld.com/j.houghton/pttute.htm. Lutz Kretzschmar also gives insights and tips at http://www.stmuc.com/digicam/.
This page is not intended to be yet another tutorial on the use of PTgui, but a collection of working samples to try the program, and templates to apply to your own images.
What
do I need ?
What
do I get here ?
For each lens setting, you will find:
Is
it usable with my camera ?
Though I used
a Nikon Coolpix 990 for the samples, it is directly applicable
to the 950 which behaves similarly. I tried to provide a wide
range of focal length so that it can be easily used with other
cameras.
How the samples were photographed
?
In order to minimize download times, everything was
shot in VGA basic mode... so don't expect high quality ! Many more details and tips here.
How do I test the samples ?
How do I apply templates to my images ?
Why is my panorama low resolution
?
Since the samples used are low resolution, the templates
themselves are targeted to low-res panoramas (this minimizes
download time, and ensures that stitching will be reasonably
fast iven with a low power/low memory computer). To get a panorama
dimension matching resolution of your images, go to the Panorama
Settings tab, increase height value up to vertical size of your
images, and enlarge horizontal size proportionnaly. Caution: this can lead to
unreasonably large images, especially for wide angle images.
I'd
like to fine tune the seams between images
Then
layered Photoshop files will be the best choice. Select that
format in Panorama Settings tab. Some seams editing techniques
are described in my previous
tutorial. When using this format, take care though of generated
file size and stitching time.
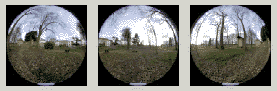
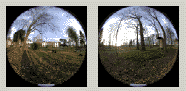
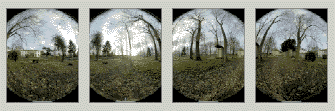
No editing was done on the generated panoramas. At least some cropping of the top/bottom of cylindrical panoramas would have been useful, but I left them as-is for documentary purposes
'Field of View
limited to 160 degrees'... Can I work around this limitation?
(adapted from PTfaq)
In the
2.5b1 and newer versions of Panorama Tools, the field of view
for fisheye images is limited to 160 degrees. If you are convinced
that you don't violate any patents by processing fisheye images,
read on:
Several users have removed the limitation by recompiling Panorama Tools. Here: http://www.ueckermann.de/pano12 you will find updated pano12 files without the limitation.
Further, the 2.5a version of Panorama Tools did not have this limitation. You can still download Panorama Tools 2.5a from this site: http://home.no.net/dmaurer/~dersch/Index.htm. As an alternative, you could remove the 160 degree limit by modifying and recompiling the source code which is included with Panorama Tools 2.5b2.
The collection (click on thumbnails to access)
|


![]()
![]()
![]()
![]()
![]()
![]()
![]()
![]()
![]()
![]()
![]()
![]()
![]()
![]()
![]()