![]()
![]()
![]()
![]()

![]()
![]()
![]()
![]()
![]()
![]()
![]()
![]()
![]()
![]()
![]()
Creating
immersive panoramas :
a "cookbook" approach
-Part 4-
7.- Fine tuning your panorama.
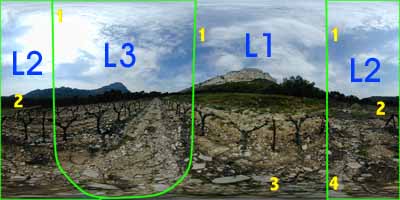
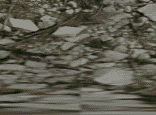
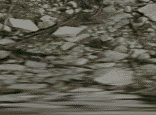
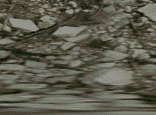
This image shows the panorama with the three images mapped to regions L1, L2 and L3. A few problems are identified by yellow numbers, we will try to correct them.
1 - The most obvious
problem : the clouds moved between the three shots so they don't
match.
2 - Image L2 is slightly darker than the two others.
3 - Bottom of L1 is too dark
4 - Bottom of L2 and L3 doesn't
join very well
It is often useful to control the modifications applied to your panorama with PTviewer. To do it : Save your layered image as a Photoshop file Flatten the image (merge all the layers) : Layer menu / Flatten image Save your image as a jpeg file Drag the saved file over the PTviewer icon, and admire your work Resume your work by reopening the layered image (or use the history to "unflatten" your image - doesn't work with Photoshop LE which has no history) |
1 - Correcting the sky
This is the easy part : because of the diffuse nature of clouds, all you have to do is to make the blending between images more progressive. This method is very effective when there is no contrasted object near the seam : color shifts or brightness differences are softened and become invisible. But it should be avoided in detailed zones because if images do not overlap perfectly you will have ghosts (partially transparent details) duplicated near the seam. That's why we will apply this only to the sky.
Before going on, some background on layers and masks is needed... Looking at the layer palette window, you can see that the image is composed of three overlapping layers, each associated with a transparency mask. This mask is white where the layer is opaque and black where it is transparent, revealing the underneath layers. Grey zones of the mask give partial transparency, partly showing top and bottom layers.
To locate the seams, you can click on the small eye located in front of layers in the palette to show/hide that layer.

First, roughly select the sky with the polygonal lasso tool (to choose it, press on the lasso tool, wait for the unfold of the lasso palette, move the cursor to the polygonal lasso tool and release the mouse button), then apply a 30 pixel feather to this selection (Select menu / Feather, feather radius = 30). The feather makes soft transitions between corrected and uncorrected regions.
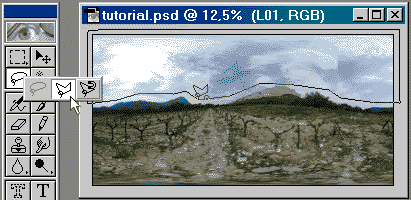
Click on the mask thumbnail of layer 2 to select it. Apply a 50 pixel gaussian blur to that mask : Filter menu / Blur / Gaussian Blur, radius = 50 pixels. The line in the sky between images L1 and L2 vanished... Select the mask of layer 3 and apply the same filter (shortcut for the last filter : Ctrl-F). The sky is now corrected. Deselect it (Select menu / None or Ctrl-D)
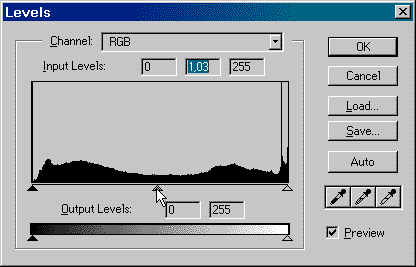
2- Correcting the brightness of image L2
Click on the image thumbnail of layer 2 to select it. Modify the levels : Image menu / Adjust / Levels. In the palette that opens then, slightly pull the gray cursor to the left to brighten midtones (the gamma meter input level should read 1.03) and then on OK. The correction is here barely noticeable, it's just to show what to do in case of more severe problems.
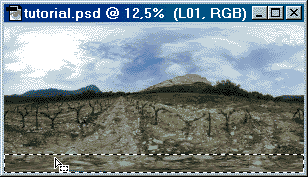
3- Brightening bottom of L1
Use the marquee tool (rectangular selection) to select the lower part of the image and apply a 100 pixel feather to this selection (Select menu / Feather, feather radius = 100). Click on the image thumbnail of layer 1 : though all the bottom of the image is selected, the correction will be applied only to layer 1. Modify the levels the same way as step 2 above but this time pull the cursor to read 1.30.
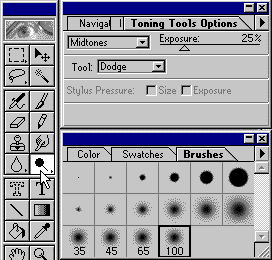
Alternate method : Click on the image thumbnail of layer 1, then choose the Dodge Tool with a big progressive brush. Brighten image L1 with successive strokes on the lower part of the photo.
4- Modifying the seam between L2 and L1
We will modify and blur the seam between these images by drawing on /erasing layer 2 transparency mask with a soft brush. Click on the thumbnail of the layer 2 mask. Select pencil, large brush. You can draw on the mask in white to erase a part of layer 2 or draw in black (use X to toggle foreground/background colors) to see more of layer 2 over layer 1.
|
Original image |
Masking more of L2
|
Showing more of L2
|
Image |
|
|
|
Mask |
|
|
|


8.- The end...
Flatten the image (merge all the layers) : Layer menu / Flatten image, save your image as a jpeg file. Drag the saved file over the PTviewer icon to see your panorama...
Some more modifications and enhancements may be applied to the flatten image :
Select everything but the sky, feather the selection and brighten a bit the ground. Take care to have the selection at the same height on right and left sides of the image, they have to join perfectly.
Using the clone tool, erase a few spots in the sky (near the horizon) probably caused by a dust particle on the fisheye - these beasts do have a great depth of field !
Apply a sharpen filter : fisheye photos are always somewhat soft.
With the sponge tool / unsaturate option, remove the blue tint (caused by the blue fringe at the edge of the fisheye circle) at the bottom of the image. Correcting things near the zenith or nadir where the distortion is important is not easy. If you have heavy modifications to do there (ie remove that ugly tripod !), you should extract a flat image with Panorama tools, modify it, then re-insert it in the panorama.
Update: Panorama Tools now include PTeditor which greatly eases extraction/insertion of flat (rectilinear) images to edit zenith & nadir |
![]()
![]()
![]()
![]()
![]()
![]()
![]()
![]()
![]()
![]()
![]()
![]()
![]()
![]()
![]()