![]()
![]()
![]()
![]()

![]()
![]()
![]()
![]()
![]()
![]()
![]()
![]()
![]()
![]()
![]()
Kite Aerial Panoramic Photography
I practice for some time kite aerial photography (KAP), but since I was contaminated by the panorama virus, I wanted to shoot panoramas from the sky. I first dreamed to craft a rotating device to snap three 120° apart photographs, but it wasn't simple enough for my taste, and since a kite is rarely completely steady, I feared stitching problems.
Then it occured to me that, from high enough in sky, only the bottom half part of the panorama sphere was useful (easily shot with a fisheye aiming nadir), and it was easy to stitch a sky shot from ground. Since sky is rather uniform, this stitching is not exacting, provided that the nadir photograp is horizontal enough (this is the most difficult part of the process! )
What is needed :
"Standard" KAP material is used : a large kite with its cable, a camera (equipped with a fisheye) with some way to activate the shutter release and some mean to attach the camera to the rope. Add to that a pair of hefty gloves to hold the cable (mandatory - or you are exposed to burns and cuts or worse...). An anemometer may be useful to better estimate the strength and regularity of wind. Last but not least, a helpful friend will hold the kite while you attach the camera to the cable and will run to catch it when landing, (fisheye lens performs very badly as a landing gear...). You will find a lot of informations about KAP on Charles C. Benton website. Useful tips can also be found on KAP images of Parramatta High School. Both contains a nice photo gallery.
Many other kite plans suitable for aerophotography can be found on Christian Becot's site.
Oct. 2002 update : Scott Haefner shot several very nice panos using this method, see his work here: http://thehaefners.com/kap/pano1/
... and what I used :
|
The kite is a Rokkaku, 1.95 m wide and 2.45 m tall. Its 5 m² area enables it to lift the camera reliably with a 2 Beaufort wind (its ideal wind is around 3 Beaufort, higher winds makes it hard to tame). The spine is a 10 mm carbon while the horizontal spars are made of 8 mm carbon. The construction plan that inspired me and useful tips can be found on Art&Flywork web site, while the 4 point briddle tuning comes from Michael Graves. |
|||
|
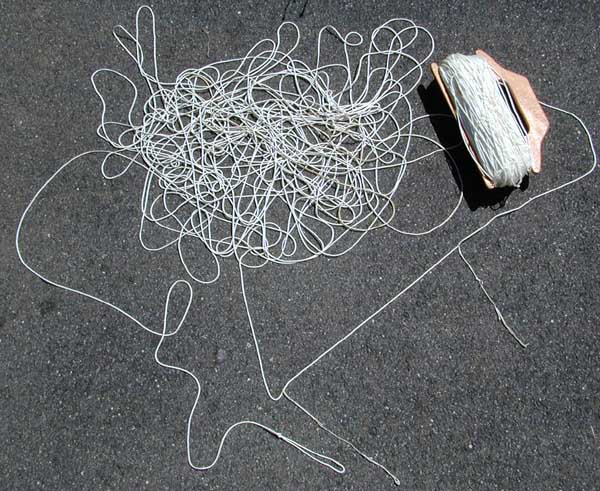
The cable is 500 m long (minus a few meters used for the briddle...), 135 kg strength. A loop at the end is used to fix the rope to the briddle with a lark head knot. Two other string loops are attached with a double lark head knot 40 cm apart, 50 m away from the end of the line to hang the camera. You can thus launch the kite and anchor it in the sky when you begin lifting the camera. |
|||
|
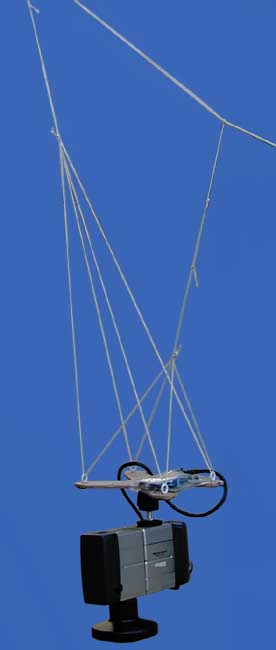
A Picavet suspension is used to maintain the camera in horizontal position, whichever the cable angle is. A photographic knee-joint is used to trim this position. |
|||
|
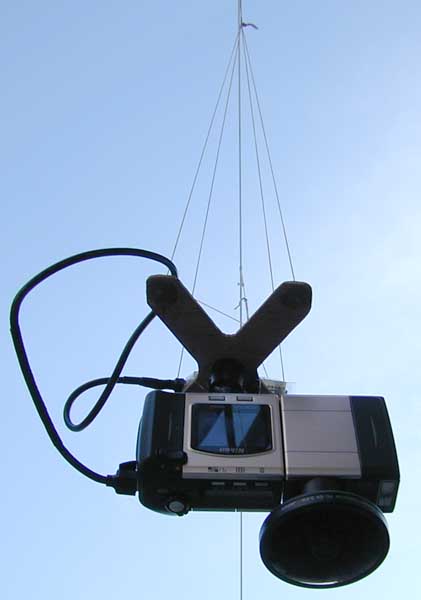
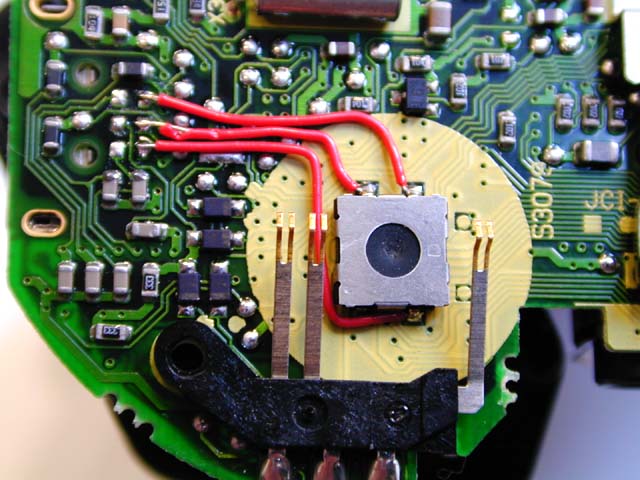
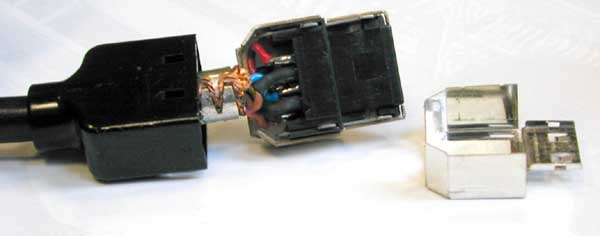
The Coolpix 900 is modified to be able to electrically command it. The three shutter release contacts are connected to the serial download connector on pins that are used only for the Macintosh (sorry for you, mac friends...). The Mac cable is connected to the command electronic, the wire linking two pin inside the plug is cut so that the Coolpix doesn't switch to download mode. Note that this modification can void your warranty ! |
|||
|
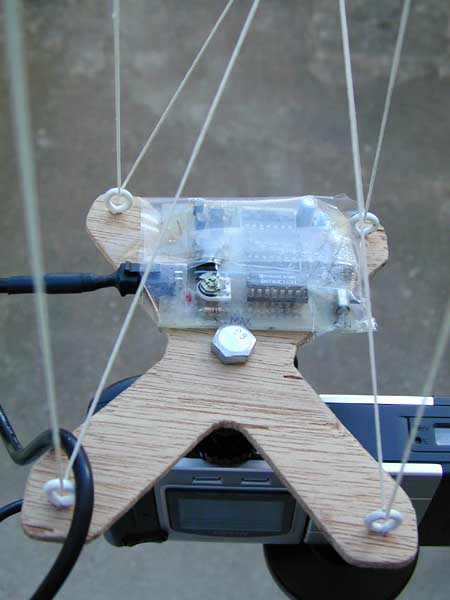
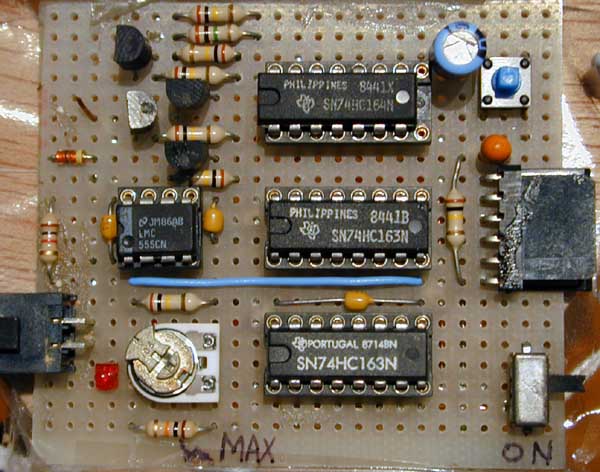
Since the electronic film is rather inexpensive, the control strategy is simple : make as many shots as possible... an electronic timer is used to release the shutter at timed intervals, a trimmer enables shooting from once every 30 s to once every 3 mn. It draws so little power that it can derive its supply from the Coolpix through RS232 signals. |

Panorama assembly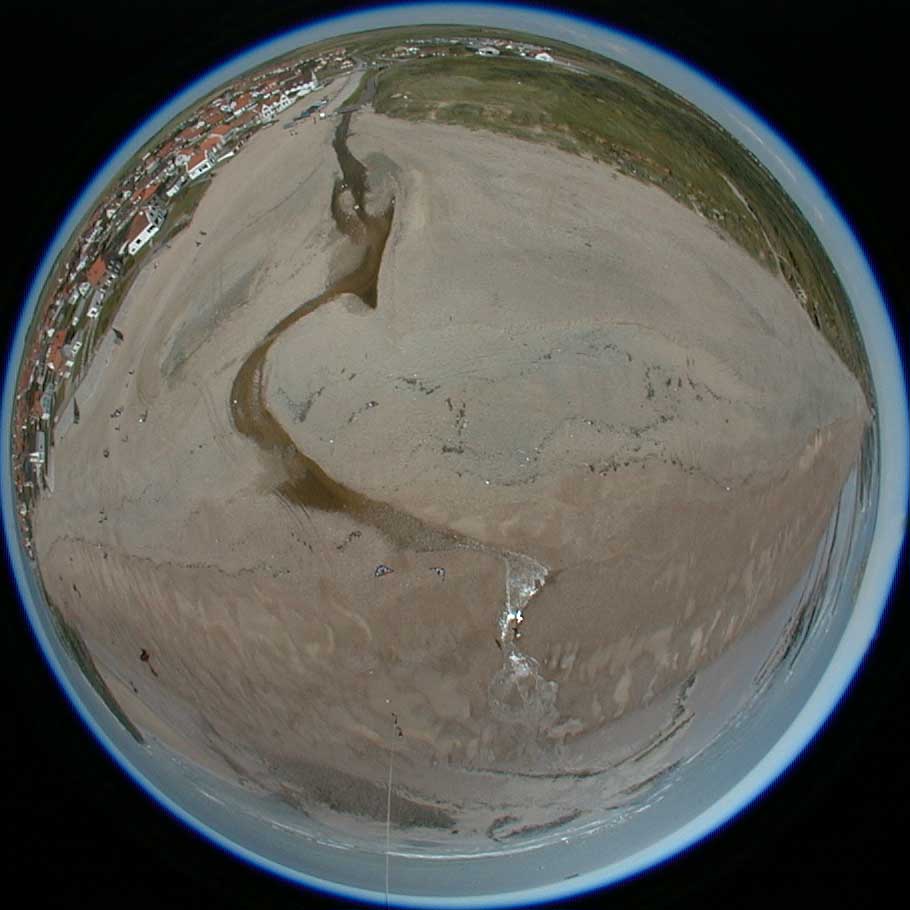
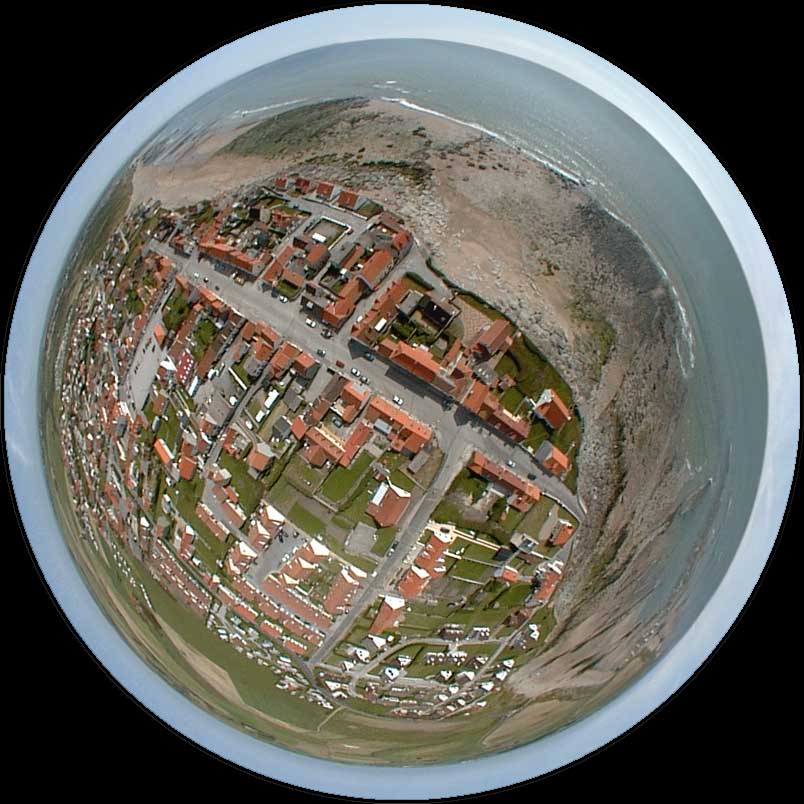
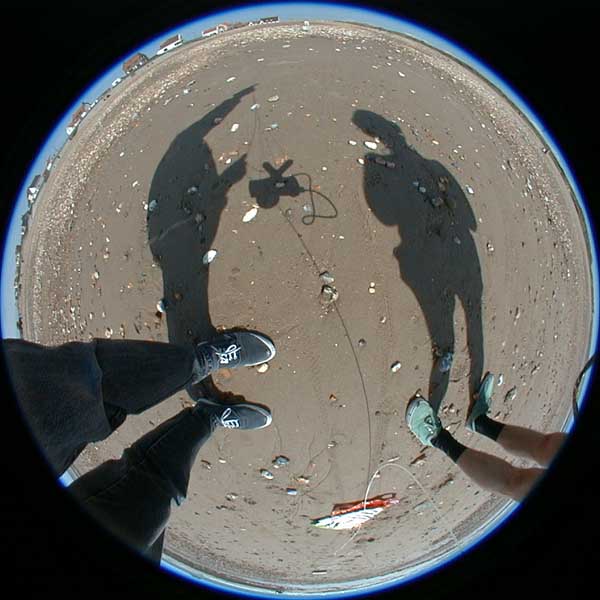
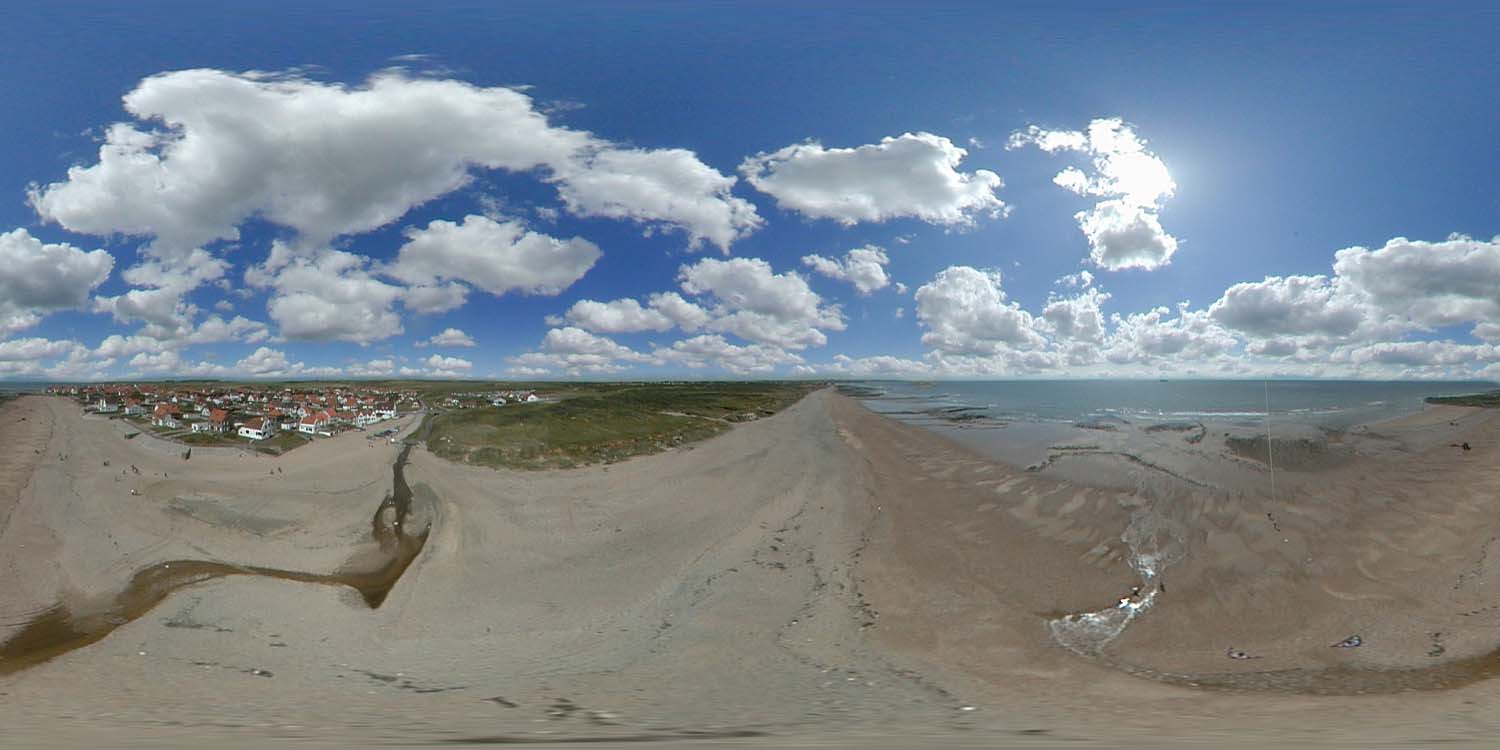
Above is the photograph we will use for the panorama. It was taken from low altitude, little after take-off. The first thing to do is to level the ground shot (the angle is rather high, I hope to get better results next time - in fact there is even a missing part in the sea on many of the photographs). I used Panorama Tools optimizer to estimate the pitch and roll of the image.
Here is the script file, very simple since there is only one image...
|
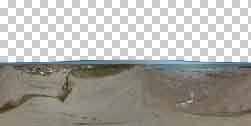
The optimizer estimates a 87.5° pitch, and running PTools in insert mode gives this half panorama:
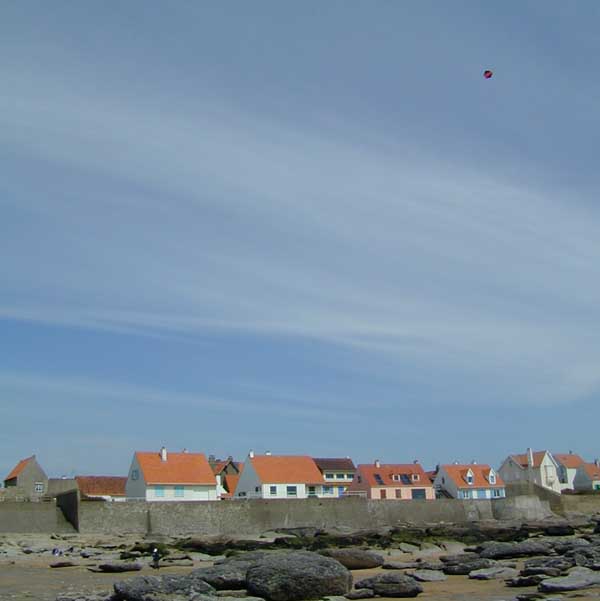
The last part is to stitch the sky, shot from ground (here it was even shot another day and elsewhere... not the best thing to do to get natural looking results !).
Note: I have several other sky domes available, see them here.
Now we remap this sky shot :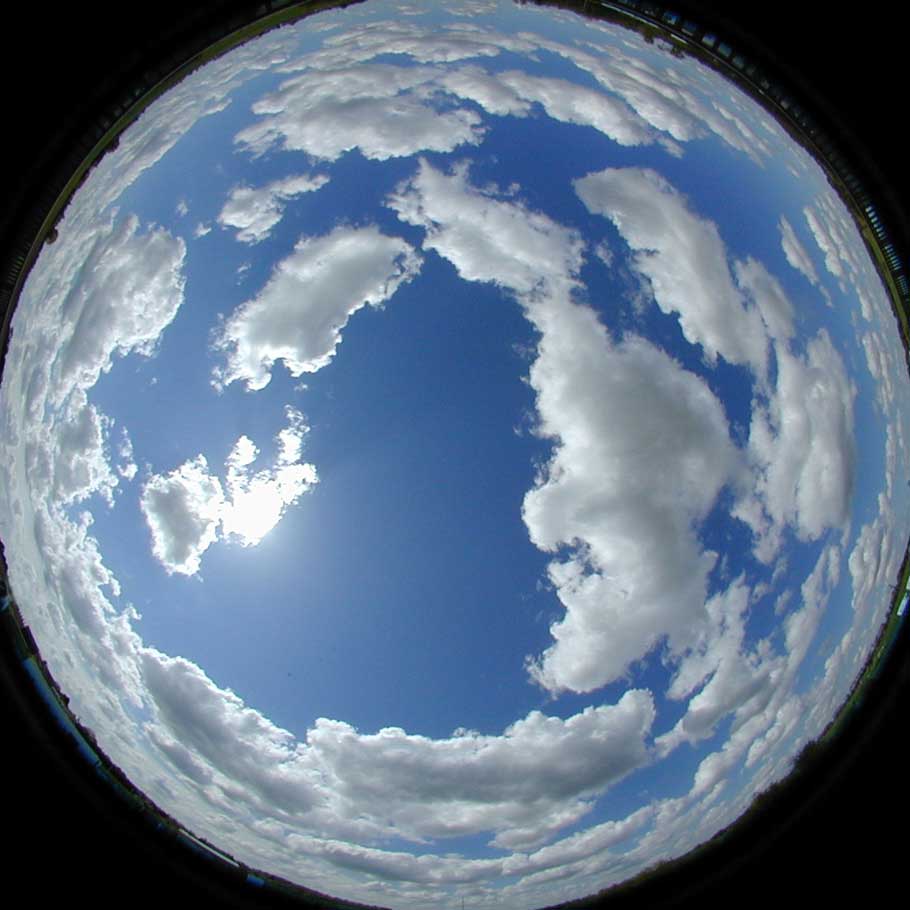 to get the upper half
of the panorama:
to get the upper half
of the panorama: 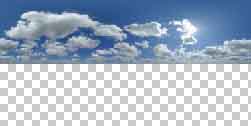 , using Panorama Tools insert with these options
:
, using Panorama Tools insert with these options
:
A careful blending of both parts gives the final
panorama, that you can see as a jpeg image,
a ![]() (Java) or an
(Java) or an ![]() (plugin
Windows here, Macintosh
here) VR scene. I didn't try to erase the rope so that you
can localize my wife and me at the end...
(plugin
Windows here, Macintosh
here) VR scene. I didn't try to erase the rope so that you
can localize my wife and me at the end...
Photo gallery
|

![]()
![]()
![]()
![]()
![]()
![]()
![]()
![]()
![]()
![]()
![]()
![]()
![]()
![]()
![]()