![]()
![]()
![]()
![]()

![]()
![]()
![]()
![]()
![]()
![]()
![]()
![]()
![]()
![]()
![]()

Correction of image distortion and perspective - part 2
More corrections...
The image obtained at the end of part one is corrected from barrel distortion, and vertical lines are no longer oblique. But camera was not perpendicular to rear wall of the room, so horizontal lines of this wall are not horizontal in corrected image. If we modify yaw angle of the image in the panorama, we can easily modify this perspective too.
Here are the additions to part 1 to do that.
Step 5
|
Control points tab:
|
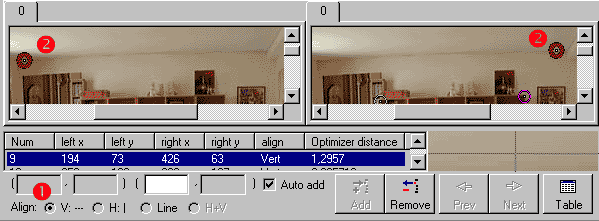
Caution: "align vertically" type CPs mean that in the resulting panorama these points should be on the same horizontal. For spherical or cylindrical panoramas, horizontal lines in real life are NOT horizontal in generated panorama. Using "align vertically" type CPs will not work in that case (the only circumstance where you can apply these CPs without problem is on a flat horizon, sea for example)
Step 6
|
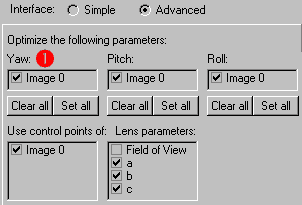
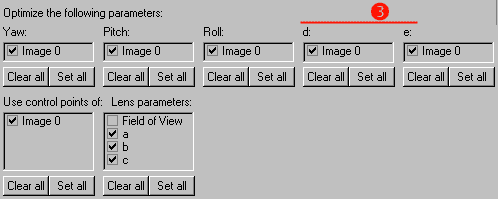
Optimizer tab:
|
Step 8
|
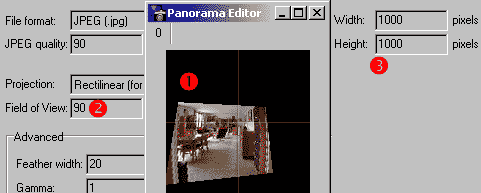
Panorama settings tab:
|
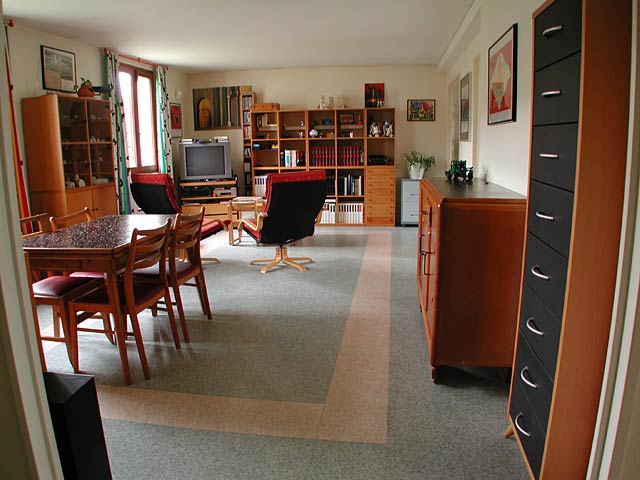
The results, after panorama creation and cropping:
|
|
|
PTgui script PTstitcher (optimizer) script PTstitcher (create panorama) script |

Fisheye images
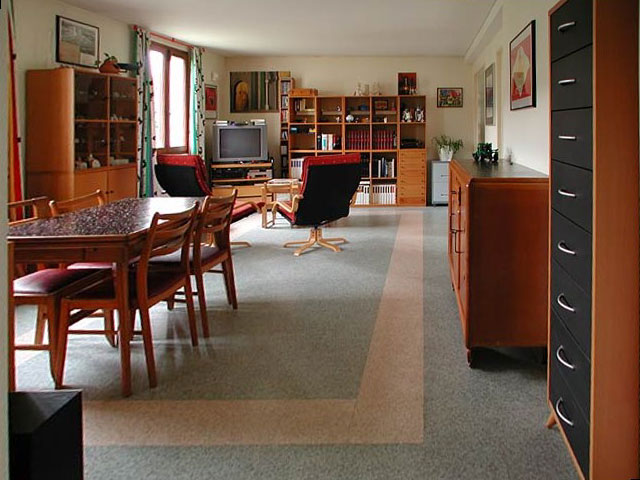
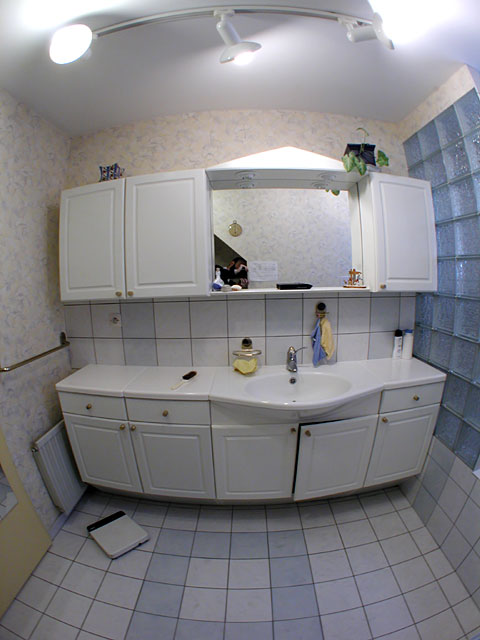
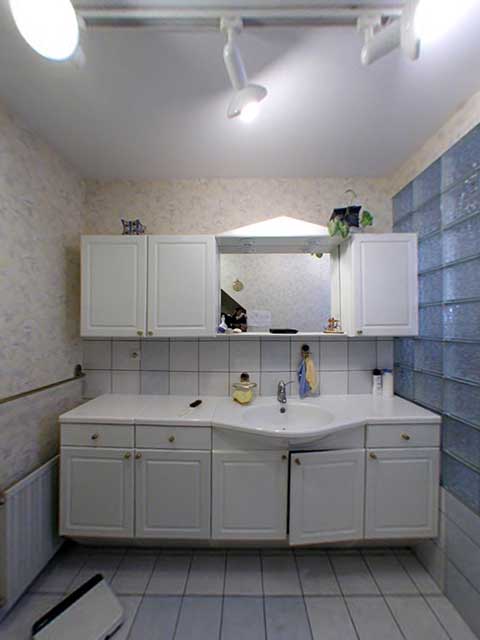
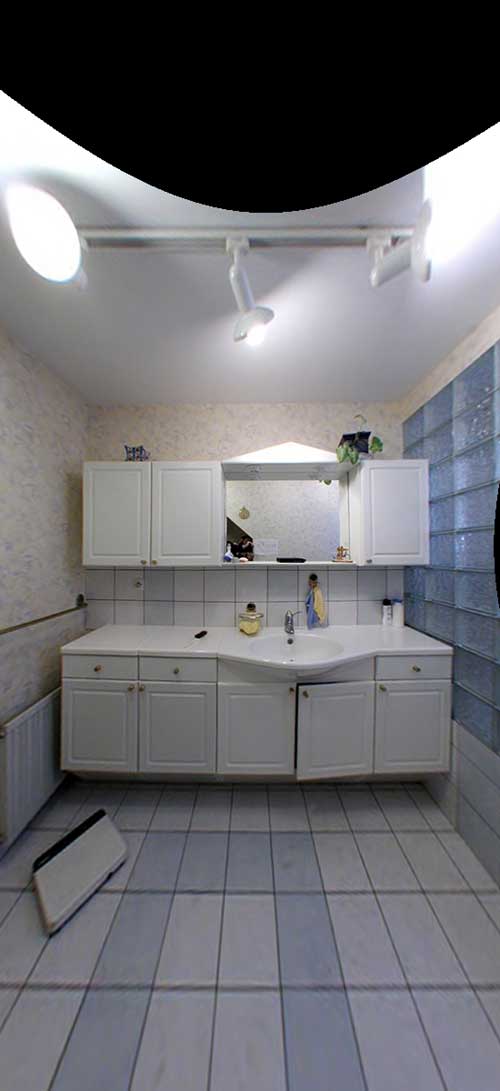
The techniques described previously apply to fisheye images, which can be handy for tight spaces. As an example I shot my bathroom with a Coolpix 990 + fisheye FC-E8 mode 2 (full frame).
![]()
The differences with part 1 are in Lens and Panorama settings tabs:
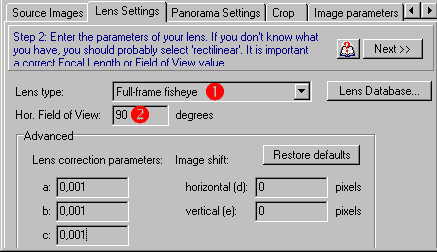
Step 2
|
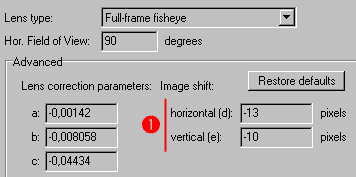
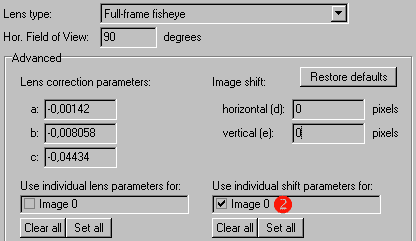
Lens settings tab:
|
Step 3
|
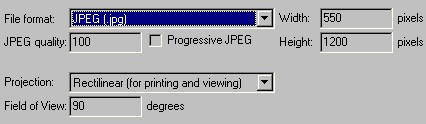
Panorama settings tab. Once again, it is of little use to increase fov above 90-100° for rectilinear projection: you may be able to get your entire image, but with too much distortion. You can have a look here to the image generated with a 110° fov. |
I placed numerous controls points on verticals and horizontals. As you can see if you try my script, optimisation results are "not so good" (though straighten image looks fine). This is caused by off-center CCD in Coolpix. Note that this center shift exists with non-fisheye images too, but has much less importance for optimisation because there is little distortion.
|
Two way to improve this:
|
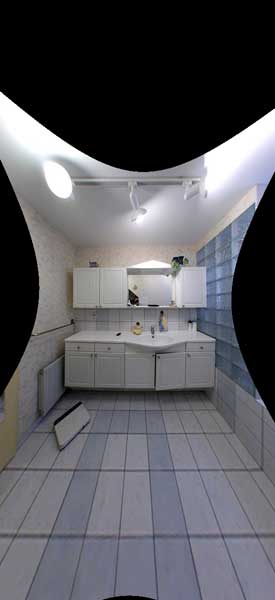
The results, after panorama creation and cropping:
|
|
|
PTgui
script ...and with d/e optimisation: PTgui
script |
![]()
![]()
![]()
![]()
![]()
![]()
![]()
![]()
![]()
![]()
![]()
![]()
![]()
![]()
![]()