![]()
![]()
![]()
![]()

![]()
![]()
![]()
![]()
![]()
![]()
![]()
![]()
![]()
![]()
![]()
![]()
- lines are curved because of lens distortion (zooms generally exhibit barrel distortion at wide angle position
- they are slanted if your camera is not perfectly horizontal.
- a working installation of Panorama Tools with PTstitcher (I used version 2.6) : get it here.
- PTgui : get it here.
- a photo-editing program will be useful to crop and rotate your images if necessary.
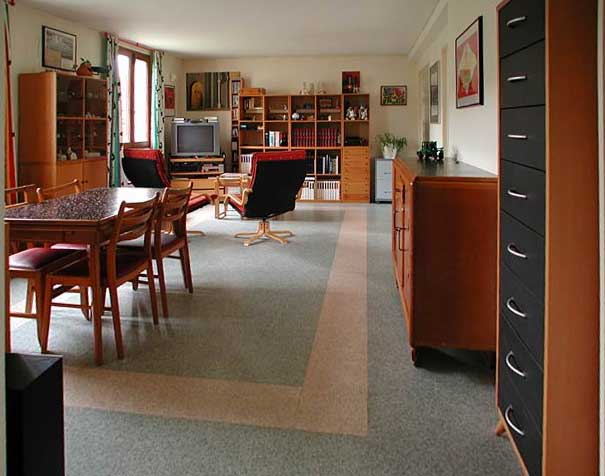
Correction of image distortion and perspective
Step by step description of a method to correct image distortion and perspective using Panorama Tools and PTgui
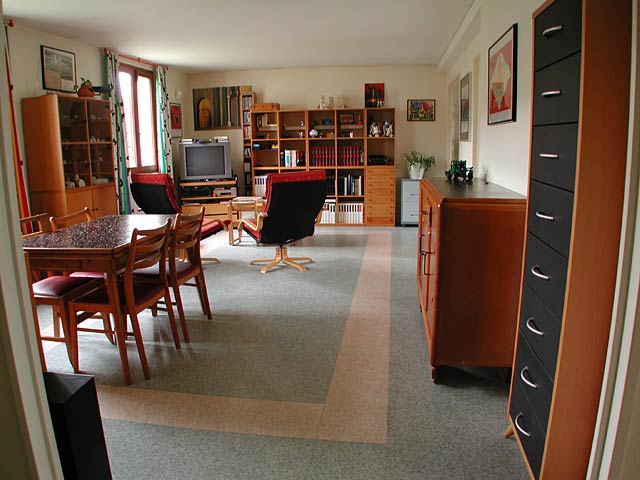
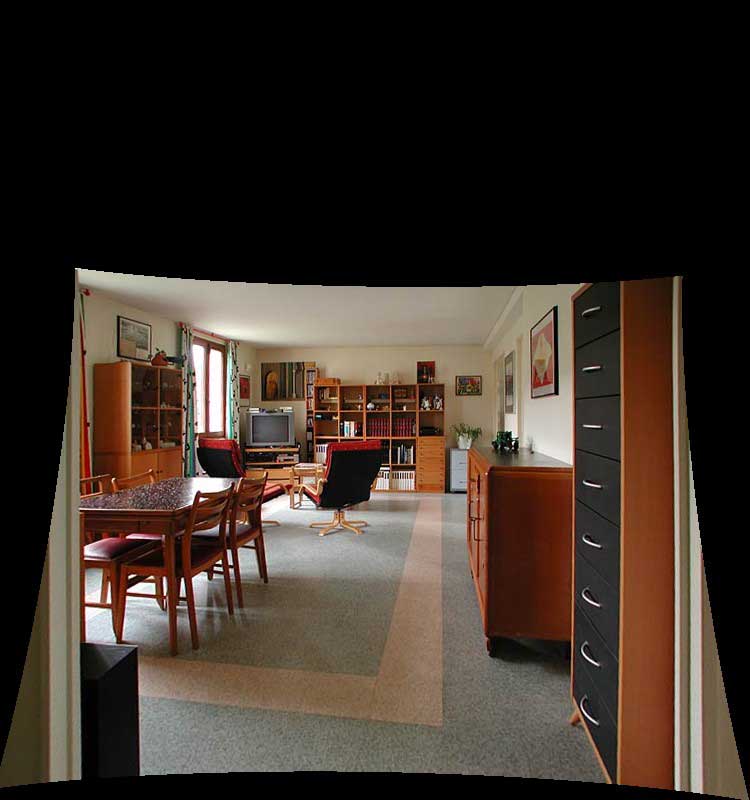
![]()
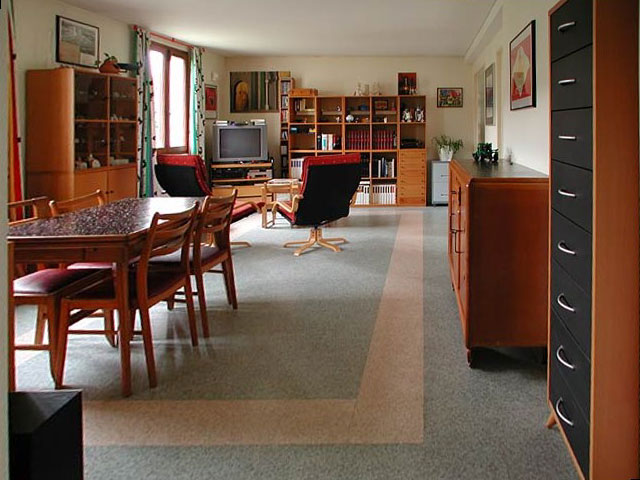
Photographed with Coolpix 990 + wide angle adapter WC-E24
There are two common problems when shooting architectural images:
Both defaults can be corrected in a single (though lengthy!) operation using Panorama Tools and PTgui. The procedure described below seems long and complicated, but this is because I tried to detail each step.
Read also "Correcting Barrel Distortion" by Helmut Dersch.
June 2002 update : Erik Krause has written a tutorial on a slightly different method to correct distortion, see it here.
What
do I need ?
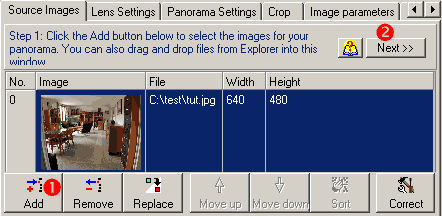
Step 1
|
Source images tab:
|
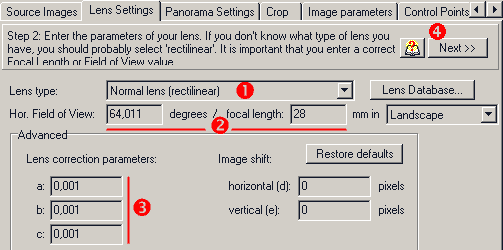
Step
2
|
Lens settings tab:
|
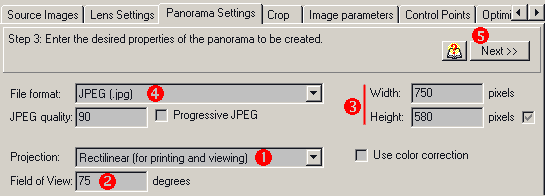
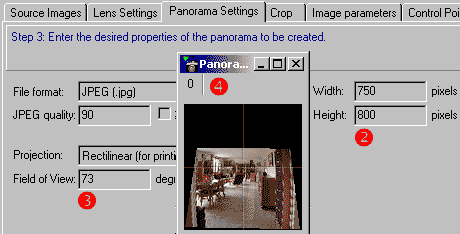
Step 3
|
Panorama settings tab:
|
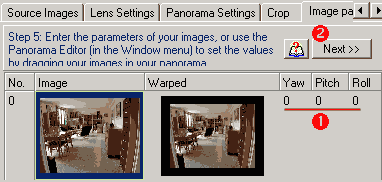
Step 4
|
Image parameters tab:
|
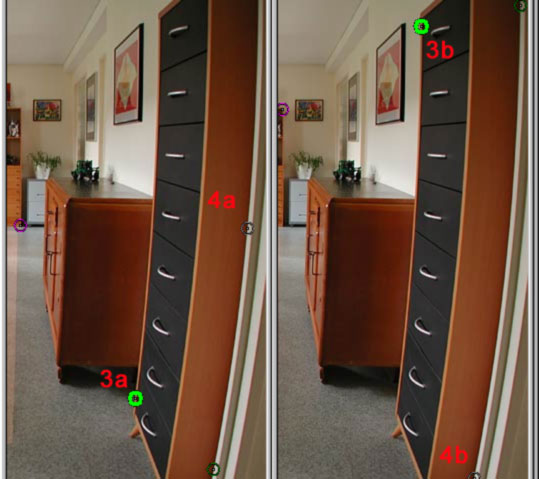
Step 5
|
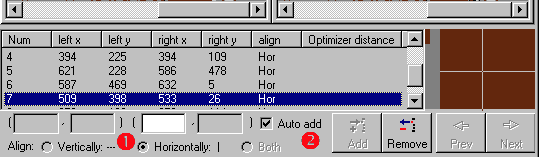
Control points tab: (CP =control point)
|

Step 6
|
Optimizer tab:
|
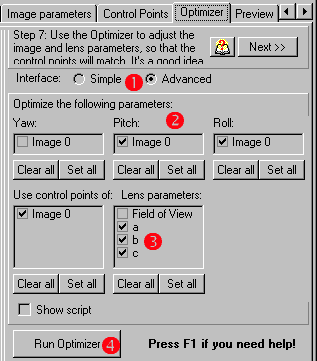
Step 7
|
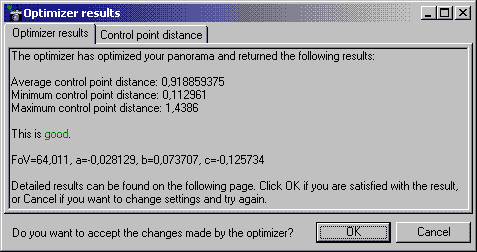
Optimizer results: After a short time, this windows opens. If you made no mistake while placing your CPs you should have a "This is good" message or even better. Click OK Note: this kind of optimisation problem generally has a lot of solutions, don't worry if you get different values for a/b/c when you modify startup values. Getting consistent values requires extensive lens calibration (see for example Big Ben's Panorama Tutorials)
|
Step 8
|
Now come back to image parameters tab:
|
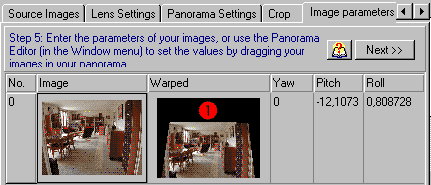
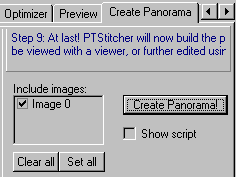
Step 9
|
Last step... go to Create Panorama tab, and click on Create button... That's it, you only have to crop image. |
Download these elements to try yourself:
|
|
|
PTgui script PTstitcher (optimizer) script PTstitcher (create panorama) script |
For more details and examples, goto part 2
![]()
![]()
![]()
![]()
![]()
![]()
![]()
![]()
![]()
![]()
![]()
![]()
![]()
![]()
![]()
![]()