![]()
![]()
![]()
![]()

![]()
![]()
![]()
![]()
![]()
![]()
![]()
![]()
![]()
![]()
![]()
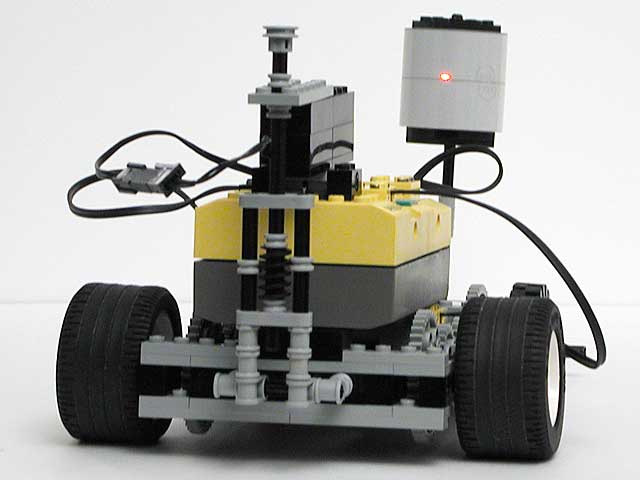
Laser Target Finder Sensor
|
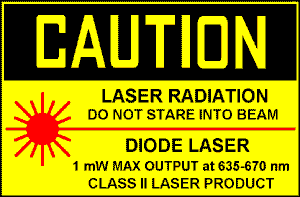
For more informations on laser security, read
Samuel
M. Goldwasser paper on laser safety |
I originally built this sensor to be able to perform triangulation navigation. I needed a way to locate three targets from some distance, so a laser pointer seemed to be tailored for the job. To keep things simple, I wanted to have passive targets, and used catadioptric reflectors to send back laser beam to the sensor.
Now I needed to be able to detect this reflected light. I first thought of integrated circuits used as infra-red remote control receivers, but these devices are sold as modules integrating the IR sensitive element and a filter eliminating visible light. I was out of luck: inexpensive laser pointers are red, a wavelength well out of the sensitivity range. I then found Plessey SL486 device, an old remote control receiver chip that did not include photodiode nor filter, so it can be used with red light. Unfortunately this chip is too old: no longer manufactured, it is hard to find, and its price reflects its scarceness!
So I went on searching the ideal integrated circuit, and finally stumbled on a family of photo-sensitive devices made by Hamamatsu. Some of them had no visible light filter, provided a modulated output to drive a LED - or a laser -, and included a photodiode with a synchronous demodulator. Perfect fit! Well... almost. Hamamatsu products are not available through electronics distributors (at least not in France), and I had to buy a bunch of chips (directly from Hamamatsu France) to reach minimum order amount...
|
|
The first purpose for building this sensor is not yet fulfilled... triangulation navigation requires fairly sophisticated software that I have not yet written: as I often say, my favorite programming language is the soldering iron! But this sensor can be used in many other applications, such as my Barrel Collecting Robot.
Circuit
analysis
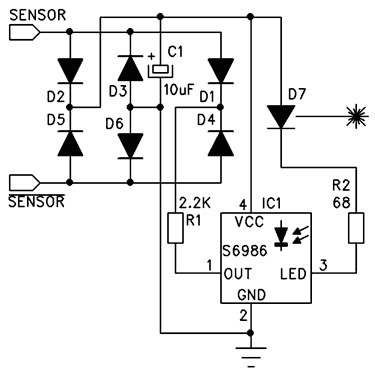
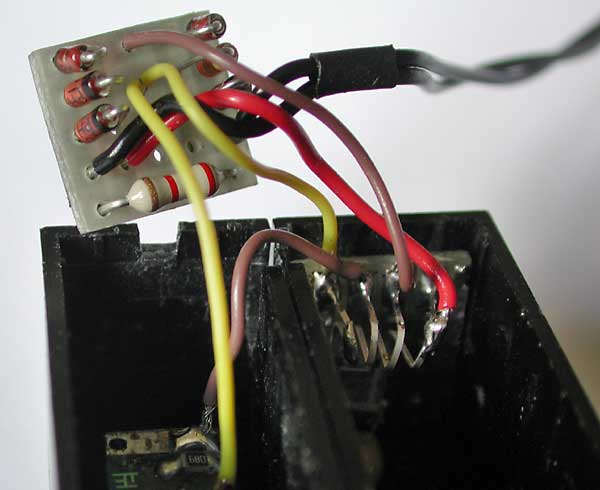
Thanks to the S6986, the circuit is very simple and requires few components. D2, D3, D5 and D6 forms a bridge rectifier allowing to plug the sensor connector brick in any direction. C1 filters power supply, it must be connected near to IC1 to bypass it properly. IC1 is the Hamamatsu S6986 sensor, the "heart" of this sensor. LED output drives the laser with a 1/16 duty cycle, and the included photodiode collects reflected light. Internal processing circuitry correlates the received light to the emitted light, this enables very reliable detection even with high ambient light.
When S6986 receives enough reflected light, its output goes to the low level (R1 limits the current), and the RCX sensor input becomes "true". Note that this sensor only returns a boolean value, "true" if the target is in laser beam, "false" otherwise. No distance information is provided.
Component
selection
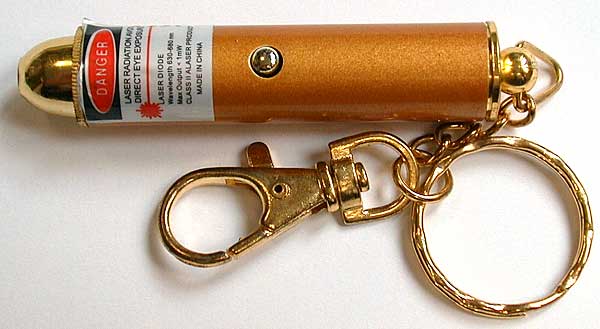
Diodes used are general purpose small signal silicon type, such as 1N4148. C1 is a 10µF 10V tantalum capacitor. D7 is the laser diode that I scavenged from a laser pointer sold as a "toy" for a few Euros. I already explained the choice of S6986, here is its datasheet. Note that the S4282-51 can be used too, only the package is different.
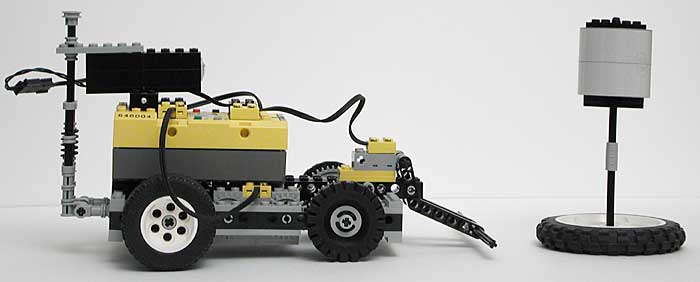
Targets
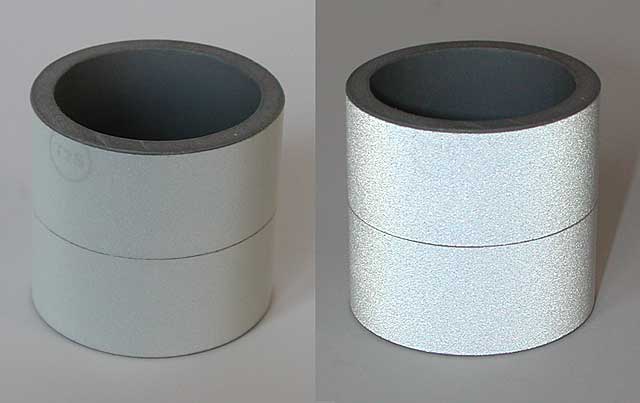
The easy part... I used pieces of 40mm PVC pipes, covered with retro-reflecting tape normally used on security clothes, motorcyclists helmets...
|
These photos shows the catadioptric effect: the left one, photographed with diffuse light, looks normal, while the right hand one is photographed with a flashlight and seems to glow because the flash light is directly bounced back to the camera. Note that the sensor may detect other reflective surfaces (mirrors, metallic tubes...) but cat's-eye reflectors are much more reliable. Mirrors must be perpendicular to laser beam, while retro-reflecting tape works with a wide range of orientations. |
Building the laser target finder sensor
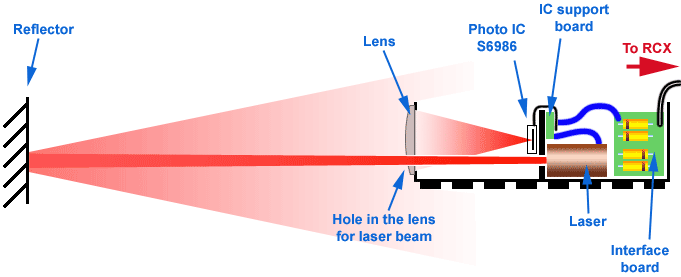
This diagram
shows the main components of the sensor, and how they are mechanically
disposed.
The electronics is simple, but mechanical construction
is not easy!
|
The cheap laser pointer I used. |
|
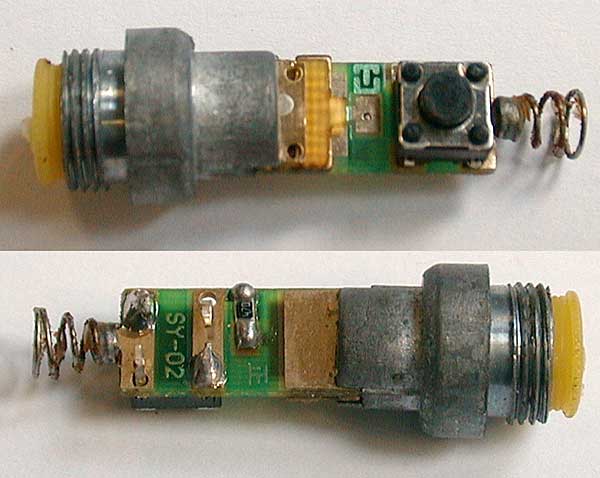
The laser module is extracted from the pointer. |
|
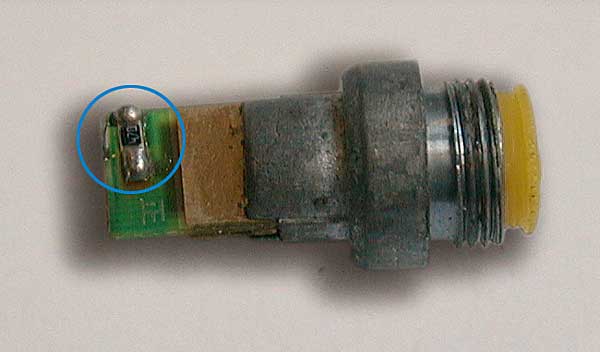
I cut out the switch and battery contact to trim the size. The 47 Ohm resistor, mounted in series with laser diode was replaced by a 68 Ohm, as shown in the schematics above (R2), to compensate for the higher supply voltage when powered from RCX (8V instead of 4.5V). Note that about 30mA are required by the laser to work properly. This is well above the current that a RCX sensor port can deliver (14 mA). But the S6986 drives the laser with a 1/16 duty cycle, so the average current is only about 2mA, well within RCX sensor port capability. Caution: Though the Hamamatsu S6986 includes a 50 mA constant current generator to drive the laser, don't remove R2 ! I did that on my first prototype, and fried the laser in less than one minute !!! |
|
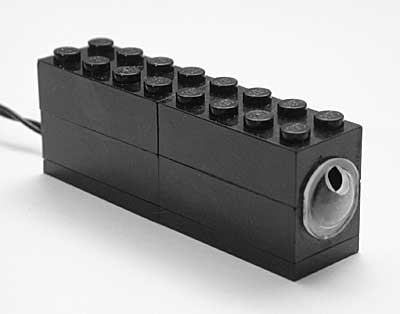
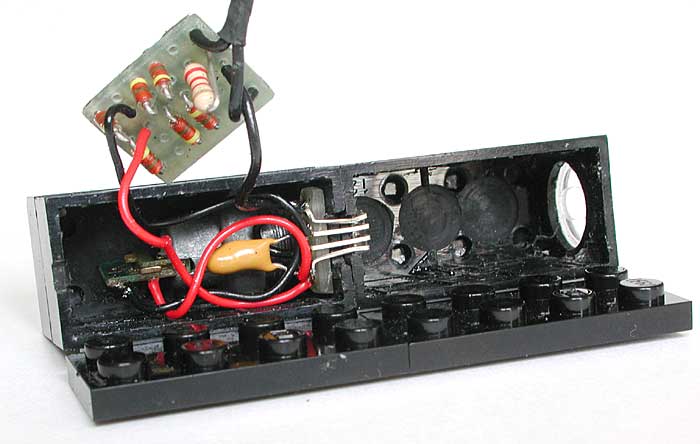
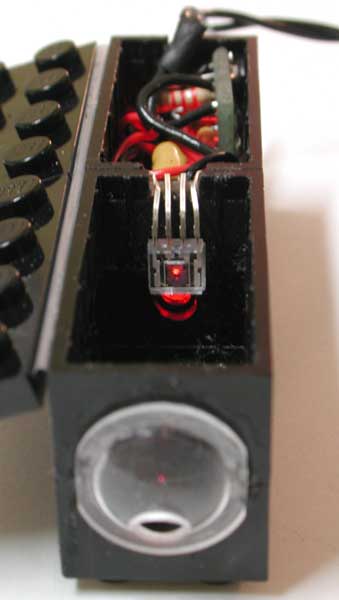
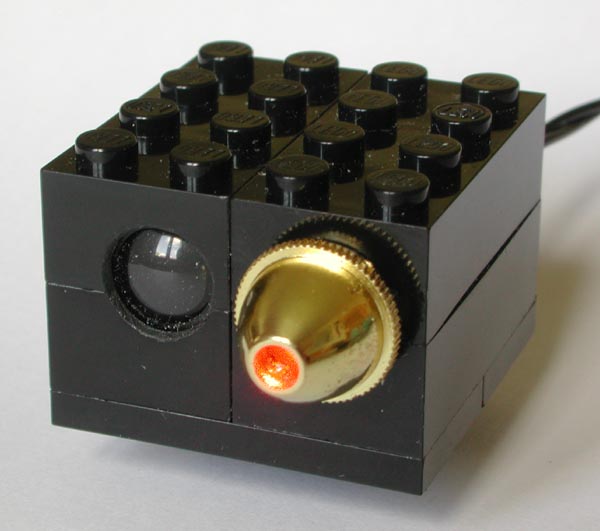
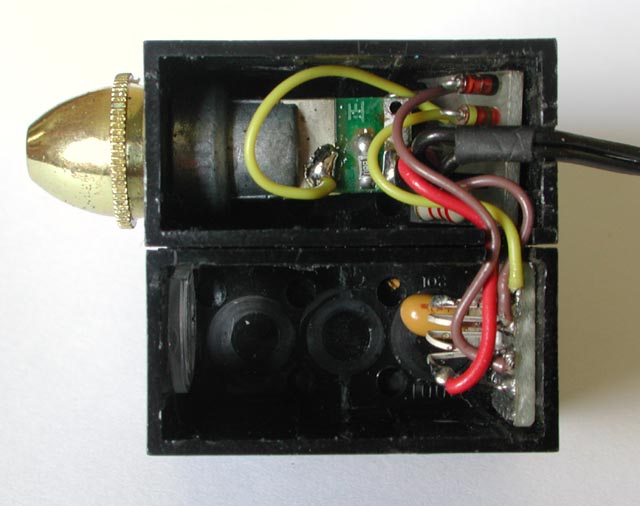
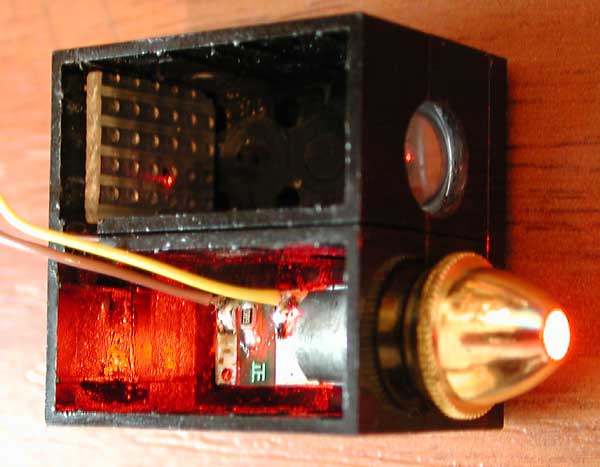
The whole sensor is built in a box made from four 2x4 LEGO bricks. The laser is placed at the bottom of the first compartment. On this image, you can see also the RCX interface board, which contains the rectifiers and R1. |
|
Before gluing the laser module in place, you must carefully align the beam with brick structure. I built this bench to do that. The white target can be moved near or far from the laser, the beam spot must remain in the same place. |
|
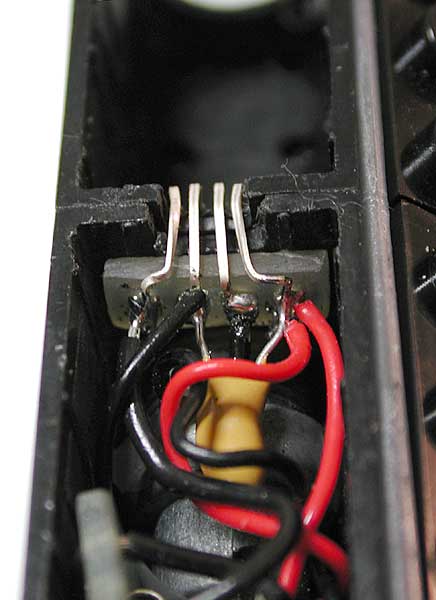
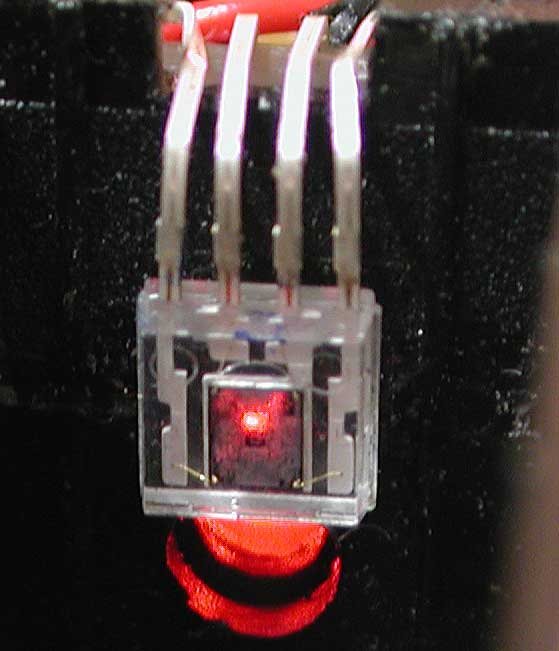
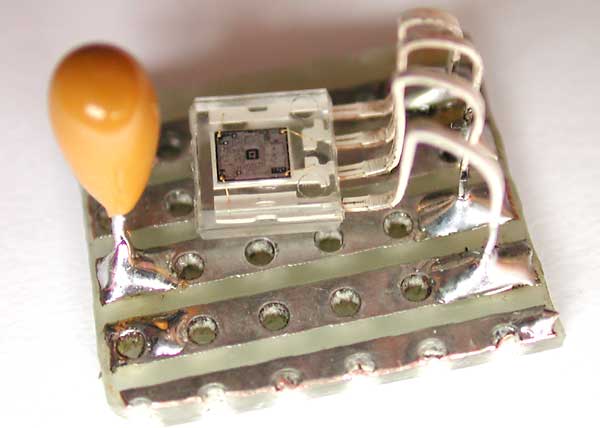
A second tiny board supports the S6986 and C1, the filtering capacitor placed next to the Hamamatsu photo-IC |
|
The laser beam must be as close as possible to the S6986. This one is placed just above the laser hole. The lens in front of the sensor collects the light and concentrates it on the sensitive area of the Hamamatsu sensor. Lens and S6986 centers must be aligned. Without the lens the working range would be below 1 meter, while a 5 to 10 meters is easily reached with it (depends on laser quality) I used a plastic lens scavenged from a disposable camera. Its focal distance is about 30mm, the lens of a LEGO brick, and it can be drilled to let the laser beam pass through undisturbed. |
|
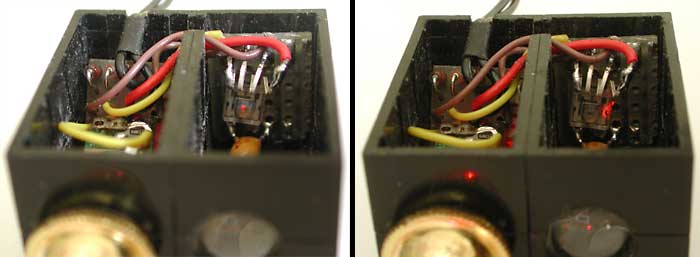
You will have to fine tune the position of the sensor (carefully bend the leads) so that returned laser spot is perfectly centered on integrated circuit sensitive area. Place a target 1 or 2 meters away, aim it with sensor laser beam and adjust S6986 position. |
Learning from errors...
|
The first version I built had the laser and detector side by side, about 15mm apart. |
|
A brick wall separates detector from laser, avoiding reflections or any direct coupling. |
|
Unfortunately, the optical axises are too distant: if the sensor is placed at the right position for distant target (left image), the light spots falls completely outside the sensitive area for close target (right image). This first sensor was definitely long-sighted and couldn't detect targets closer than 50cm. Note that the long distance sensitivity was very good for this prototype, it can spot targets more than 10 meters away. The reason is that I got a much better laser unit this time (brighter and better collimated). These ultra-cheap laser pointers are only worth their price !!! |
Some more images of the first version...
|
|
|
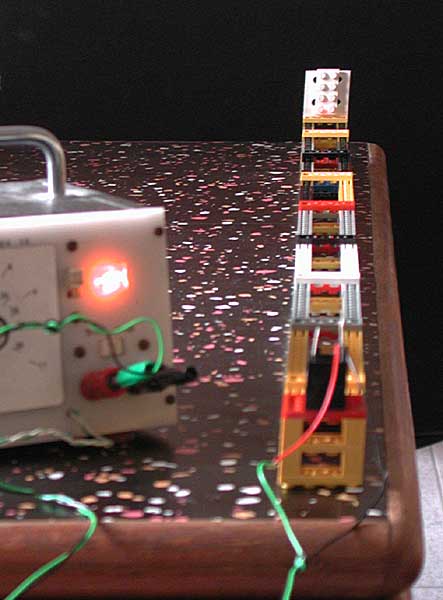
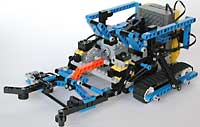
- Laser Sensor Test Vehicle (LTV)
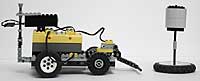
This little vehicle goes to a target and turns when bumper hits it. Several targets creates a circuit and LTV travels endlessly between them.
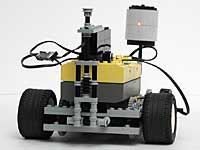
You can see the red laser spot on the target. The rear assembly is a trimmer used to adjust the laser horizontality.
- Building instructions for LTV (uses only parts in Robotics Invention System kit).
- NQC
 code LTV.
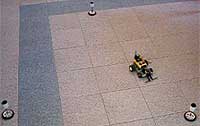
QuickTime movie of LTV (130K). This movie is 5x accelerated.
Test program
This sensor needs no test program... used as a light sensor, it returns 100% if a reflecting target is in laser beam, 0% otherwise.
Real
applications
- Barrel Collecting Robot
This robot detects barrels up to 3 meters away, goes straight to them, grab them with its arm and collect them in a basket.
See it here.
- Daniel Rojas' Rocket Launcher
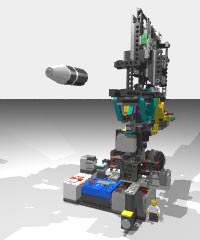
Daniel Rojas built an automated rocket launcher which uses a laser sensor to find and shoot targets. See his very impressive robot here.

![]()
![]()
![]()
![]()
![]()
![]()
![]()
![]()
![]()
![]()
![]()
![]()
![]()
![]()
![]()