![]()
![]()
![]()
![]()

![]()
![]()
![]()
![]()
![]()
![]()
![]()
![]()
![]()
![]()
![]()
3-D panorama printing: enter physical reality...
|
||
|
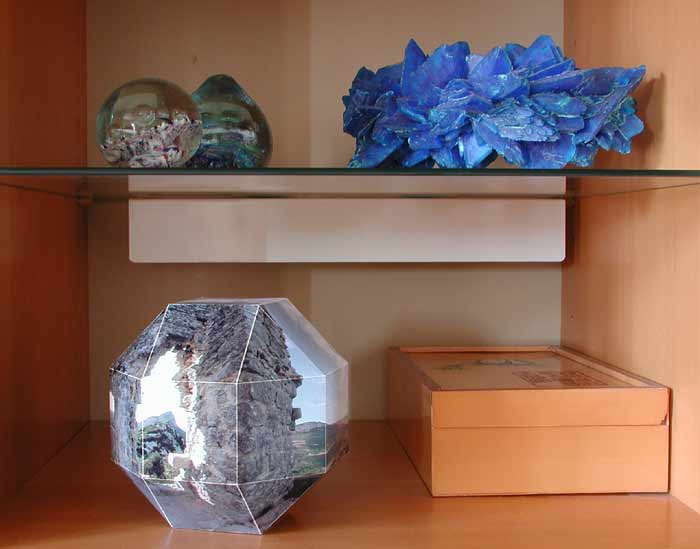
Printing full sphere panoramas on a paper sheet is the same problem as to represent the earth on a map: it's impossible without heavy distortion. Here is a method to print your panoramas to a polyhedron approximating a sphere. Small rectilinear images are extracted from the panorama for each face of the polyhedron. I'd like to thank Mark Fink whose questions triggered all this.
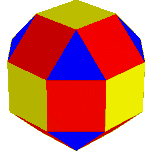
The polyhedra I choose is a rhombicuboctahedron
because:
- the face number is high enough to look like
a sphere
- its structure makes it easy to calculate
all the needed angles and lengths (well, almost, see here)
- it
can be flattened on a square grid, so the rectilinear images that
make up the faces can simply be put side by side.
- Panorama Tools plugin for Photoshop, properly installed
- a Photoshop plug-in compatible image editor. I used Photoshop 5, and will continue the explanations with it
- extraction scripts for PTools you can download here.
- Open your panorama.
- Start Panorama Tools plugin: Filter>Panorama Tools>adjust, select options "Extract" and "Use script"
- Press the "Browse" button and select the first script, t1.txt. Click "Open"
- Press the "Prefs" button, select options (b) and (d). Type t1 in option (b) file name and press ok.
- Click Ok again, the first image will be extracted and placed as layer 1 in t1.psd.
- Repeat the filter 7 more times to generate the 8 triangular tiles. If you get lost in the count, open the script t1.txt, you will see lines beginning with a ! and lines beginning with o. Those with a ! correspond to processed tiles, o lines to tiles remaining to extract. Panorama Tools modifies the script at each step, replacing o lines by ! lines. When everything is done, it replaces back all ! by o, thus restoring the script.
- Repeat all these operations with script s1.txt, this time chose the name s1 to generate s1.psd. Apply the filter 9 times (total count).
- Idem with script s2.txt to get s2.psd.
- Open the template file templ1.psd (get the template files here). The template files contains Photoshop line-up marks to help aligning the tiles (don't forget to display them and validate their magnetism). An upper layer contains white triangles masking unwanted parts of triangular tiles, and black lines to help you cut and fold the polyhedra. This layer must remain on top of all others. The template files are sized so that they can be printed on A4 or letter paper, with a 200 dpi resolution.
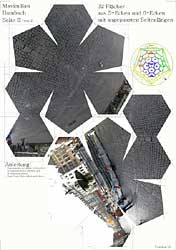
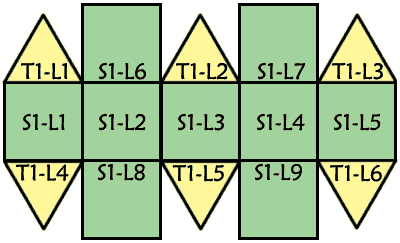
- Open the triangular tiles file (t1.psd), then drag and drop the first six layers on t1.psd. Use magnetism to align the tiles where they belong, according to the diagram hereafter. The tiles must be aligned with the triangle pointed tops, the opposite edge will be masqued by the square tiles.
- Place now the square tiles from s1.psd
- Print the first part on lightweight cardboard
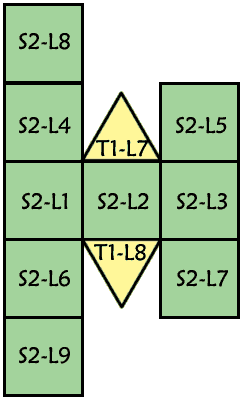
- Repeat the same steps with templ2, using the last two tiles from t1 and she square tiles from t2. Print it.
Everything you need to know about polyhedra (and probably much more) can be found in George W. Hart's home page. His WRML representation of the rhombicuboctahedron is here.
Generation of images for each face
Each face of the polyhedron is covered by a rectilinear image extracted from a psphere panoramic image with Panorama Tools. All angles and field of view are calculated so that images match perfectly on edges.
You will need:
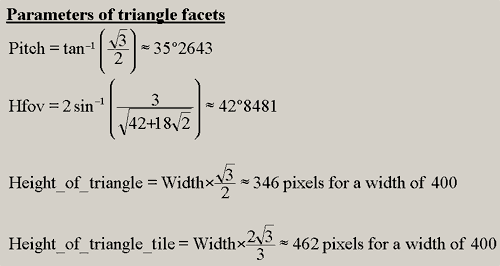
Script t1.txt extracts the triangular tiles (actually, rectangular ones which will be placed in the triangle faces), s1.txt extract the first nine square tiles and s2.txt the remaining squares. These scripts applies to a psphere image of width=2400 / height=1200 and extract tiles width=400. You will have to modify the scripts to use other sizes (exact values for triangular tiles can be found here)... Each script generate one layered Photoshop document, with one layer per tile. I splitted the script in three parts so that the resulting file size is not too big - and anyway the triangular tiles are not the same size as the square ones and can not be mixed.
Proceeding:
Tiles assembly
Proceeding:
As a picture is worth a thousand words, find here the files I used (original size, but heavily compressed)
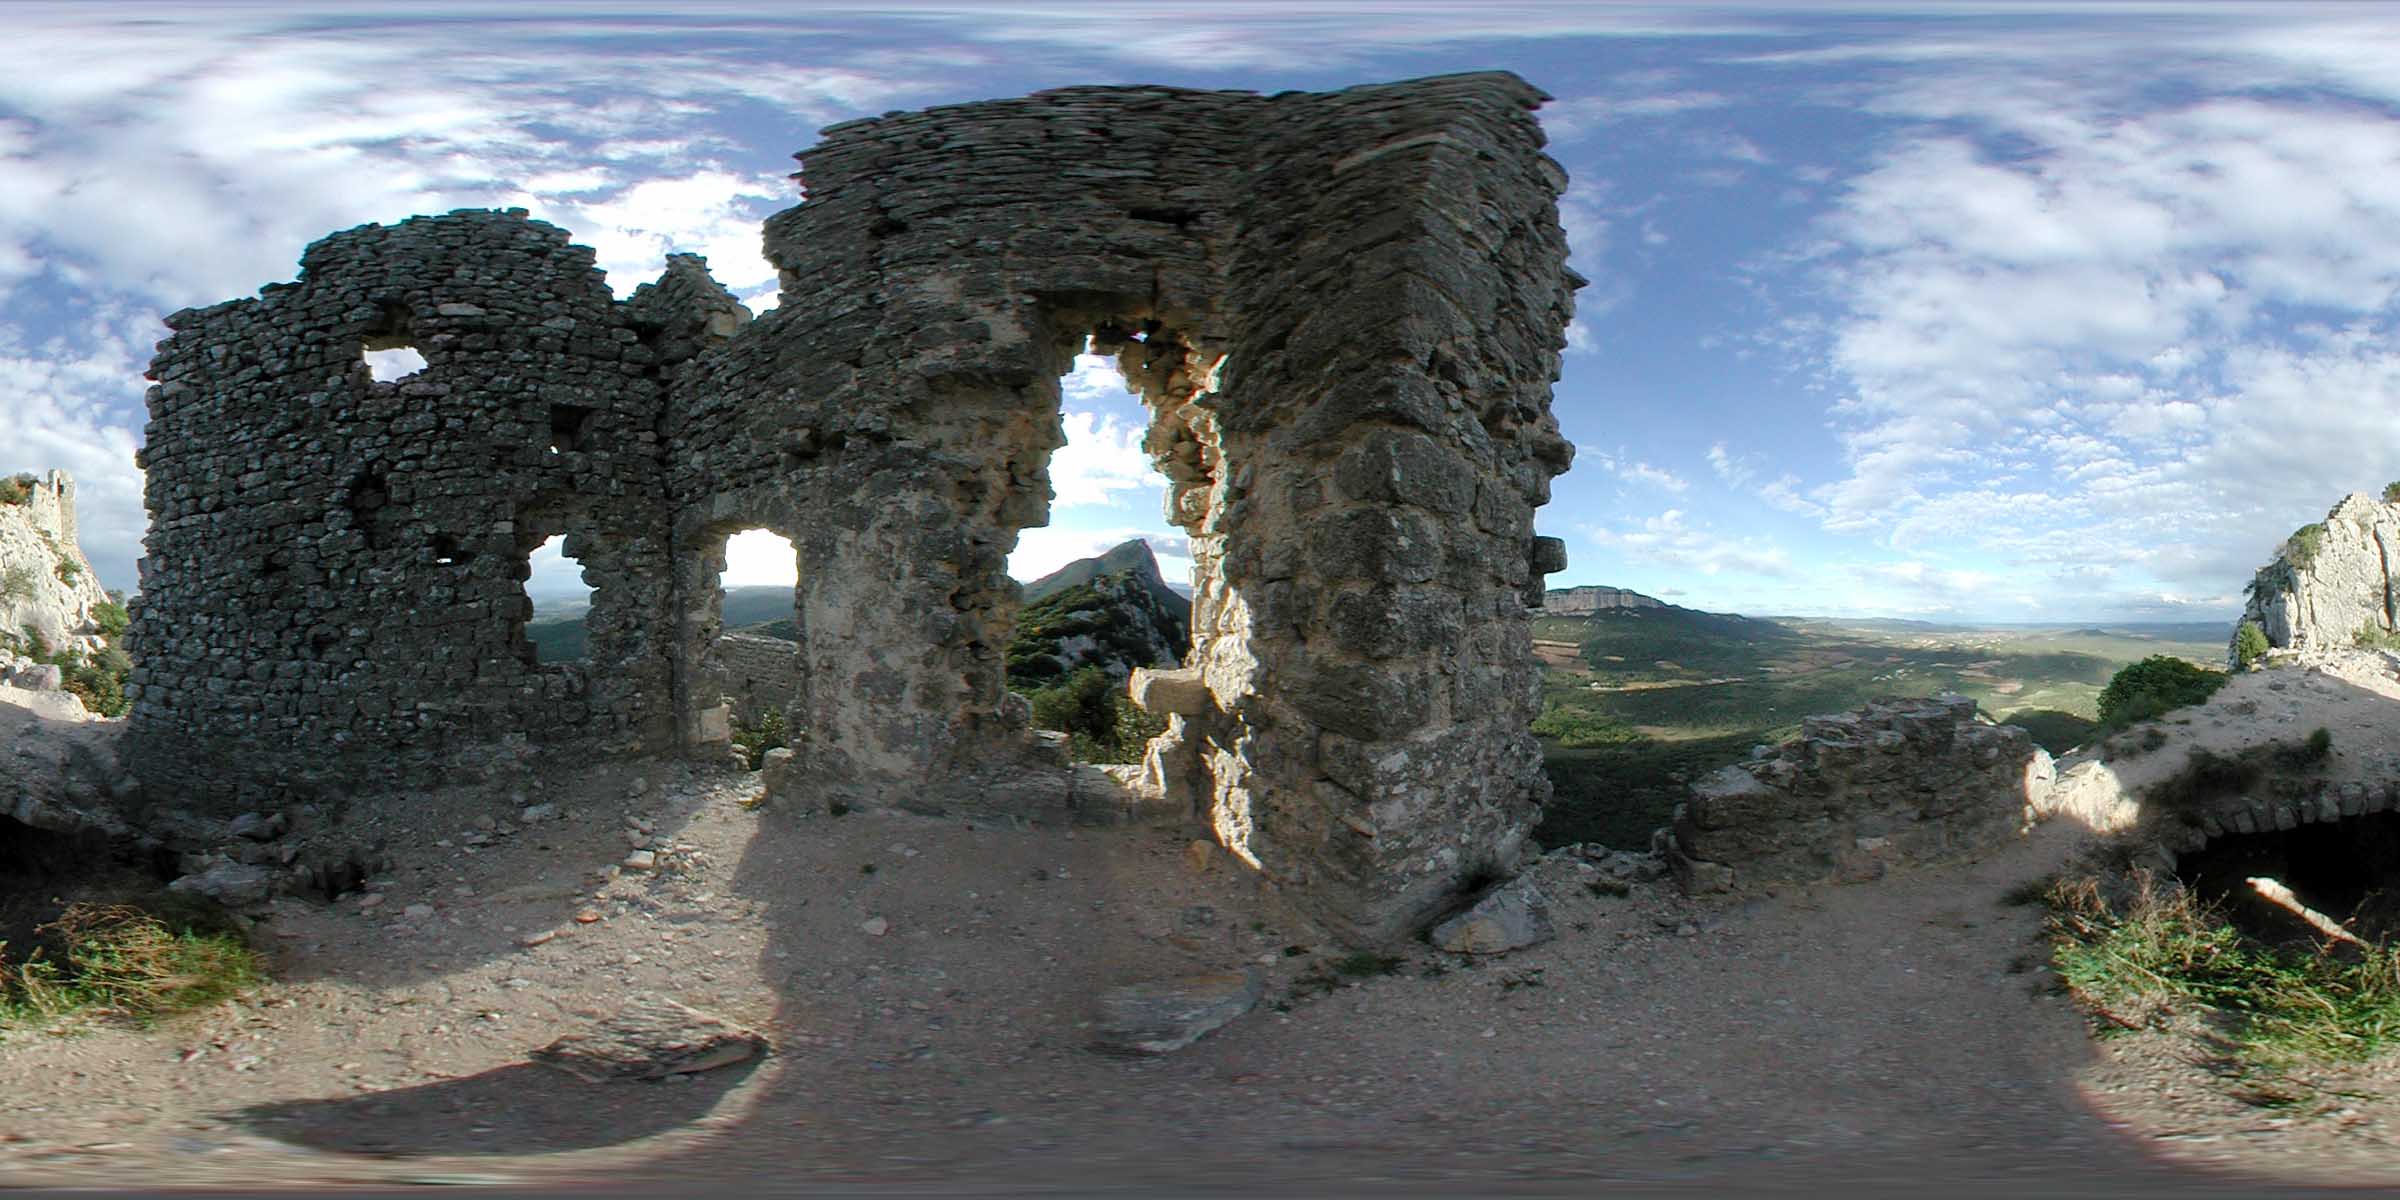
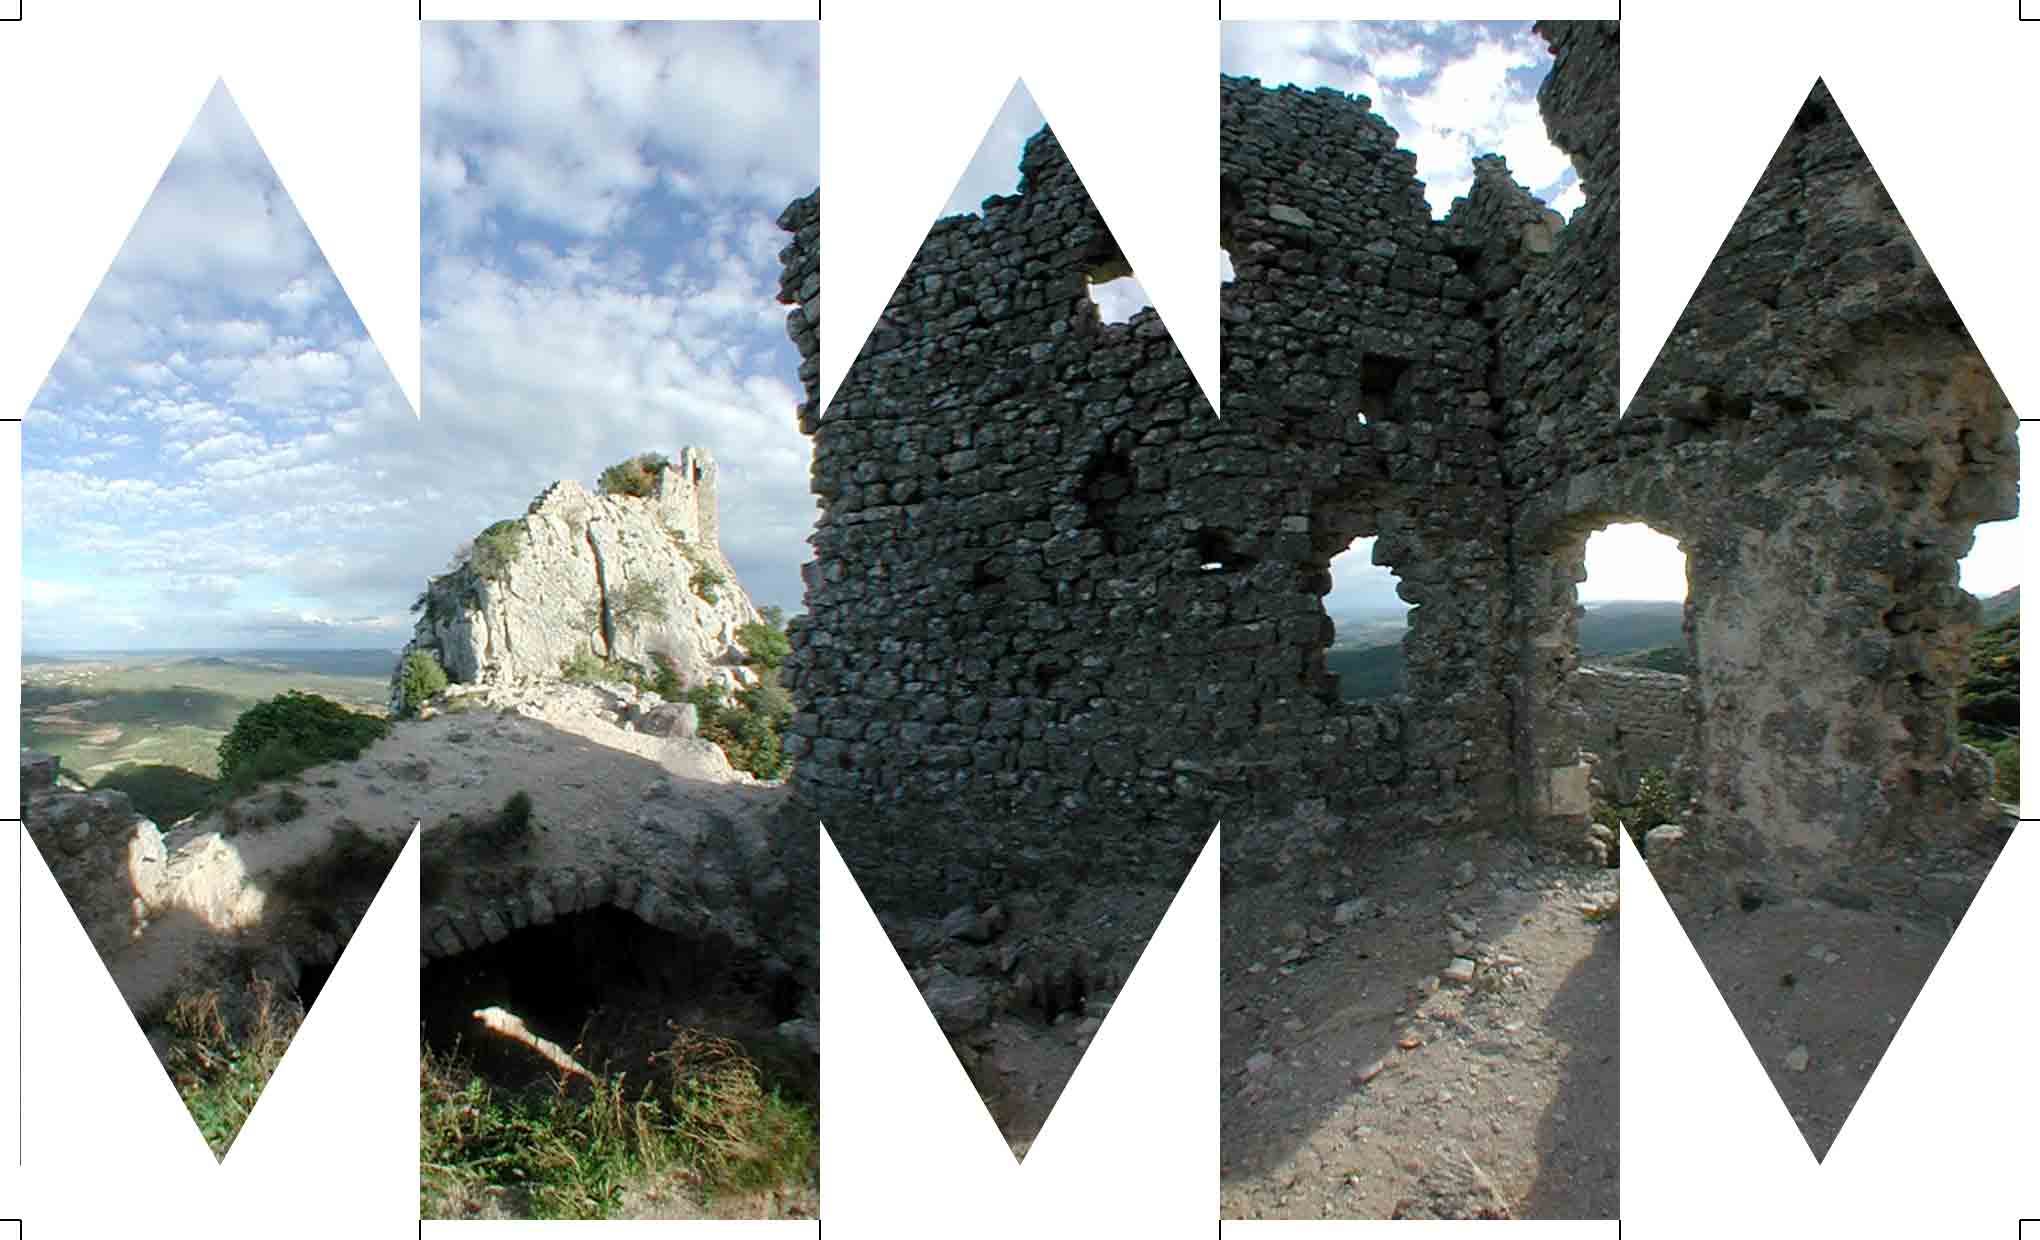
And see the VR panorama with Java PTviewer or with iMove Plugin
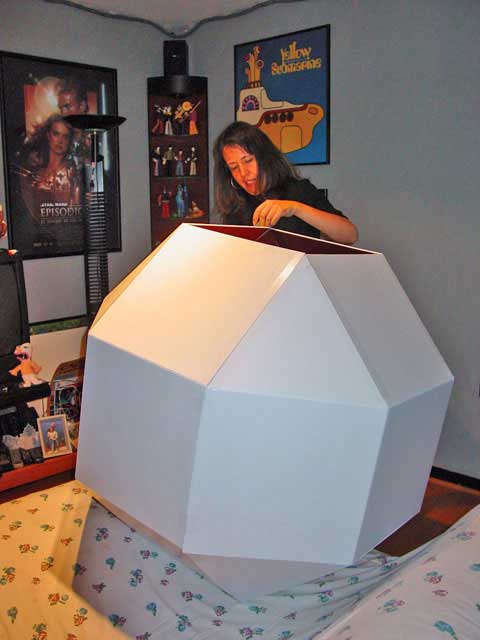
Polyhedron assembly
First mark the folds using a knife, using the black marks as guides. Carefully cut around the images and assemble your rhombicuboctahedron using tape places inside (you may also leave assembly tabs around and use glue, but there is a great risk of leaving stains on the freshly printed images...).
The assembly of cardboard polyhedra is described with much more details by George Hart here.
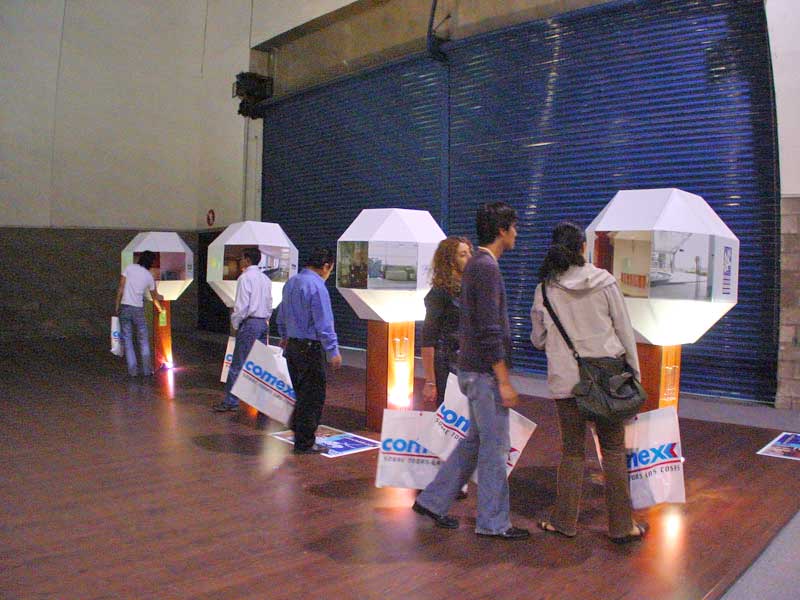
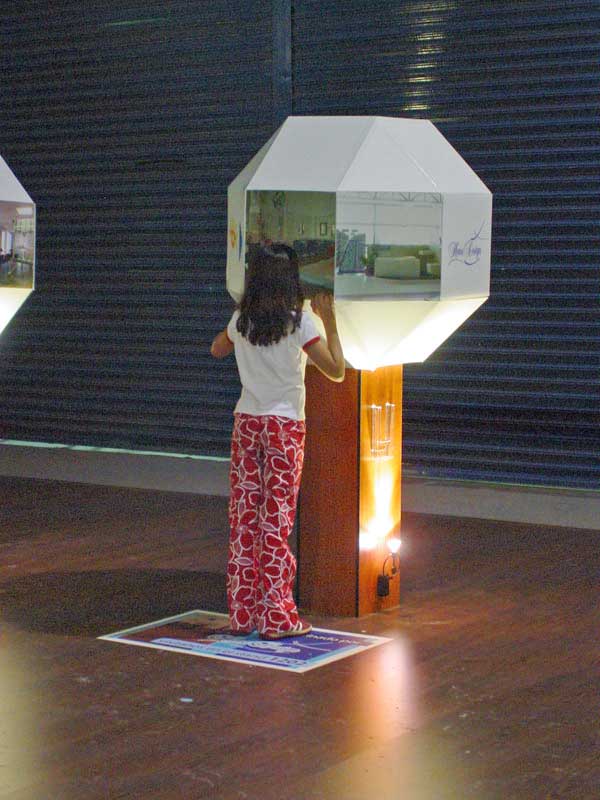
... and if you have an A3 printer, plenty of photographic paper and a hires panorama, you can build a BIG rhombicuboctahedron (without bottom and assembled inside out), slide your head in the hole and really enter physical reality! (you will have to find a way to light it inside too...)
A better sphere approximation
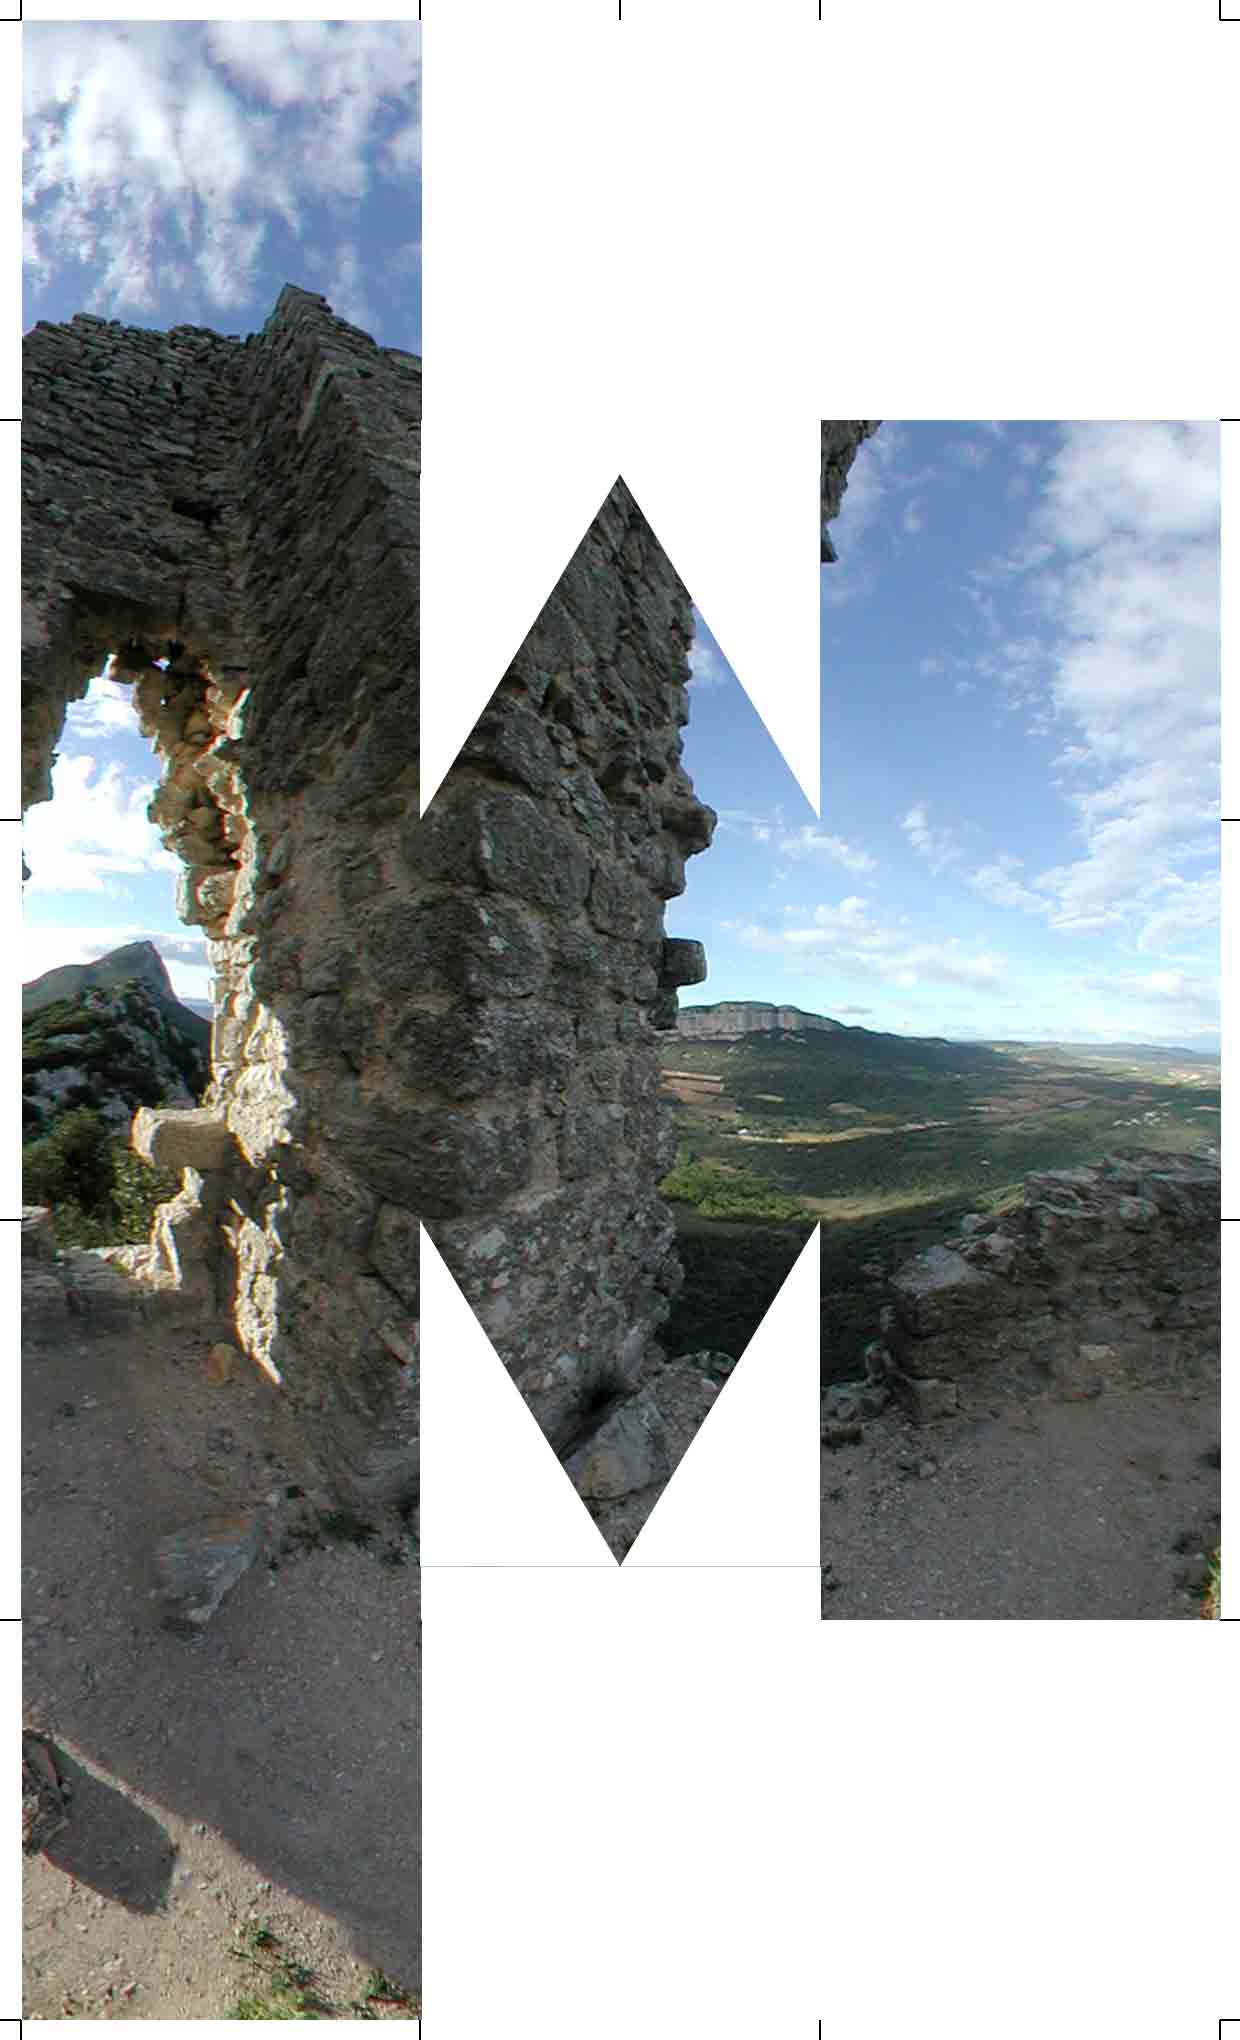
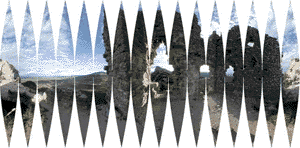
To get a better sphere approximation, Bruno Postle created a Perl script to remap a panorama to "orange slices", looking like this:
- as a Filter Factory source file (slicer.afs)
- as a compiled filter for Windows (slicer.8bf)
- If someone can compile this filter for Macintosh and mail it to me, I'll place it here...
- If you use the source file, first place Filter Factory in the filter folder of your Photoshop program installation. It is located in a subdirectory of the "Goodies" folder of your Photoshop disk (FFactory.8bf). Then start Photoshop. The filter will be applied by starting filter factory (Filter/Synthetic/Filter Factory) then loading slicer.afs.
- if you use the compiled version, place slicer.8bf in the filter folder of your Photoshop program installation. Then start Photoshop. The filter will be applied with Filter/Synthetic/Slice Remap
- Open your psphere image and apply the Slice Remap filter. The first control adjust the number of slices (between 3 and 32), the seconds slightly thickens the slices.
- Since the interpolator of Photoshop is much better than what can be implemented with filter factory, I didn't modify the height of the image. You will have to scale the height of the image by a factor given in this table (Pi / ( n * tan ( Pi / n ) )
- Now print it, cut it and assemble it (good luck: it is more difficult than a polyhedron!)
You can see his work and download the script here.
Seeing this, I wondered if it was possible to implement this transformation as a Photoshop filter (some people, including me, doesn't speak Perl very fluently...). After a lot of fiddling with Photoshop Filter Factory, I finally obtained a working filter (the most difficult part was dealing with Filter Factory's 32 bits integer arithmetics, avoiding both rounding and overflow errors).
You can get this filter here:
Use of this filter:
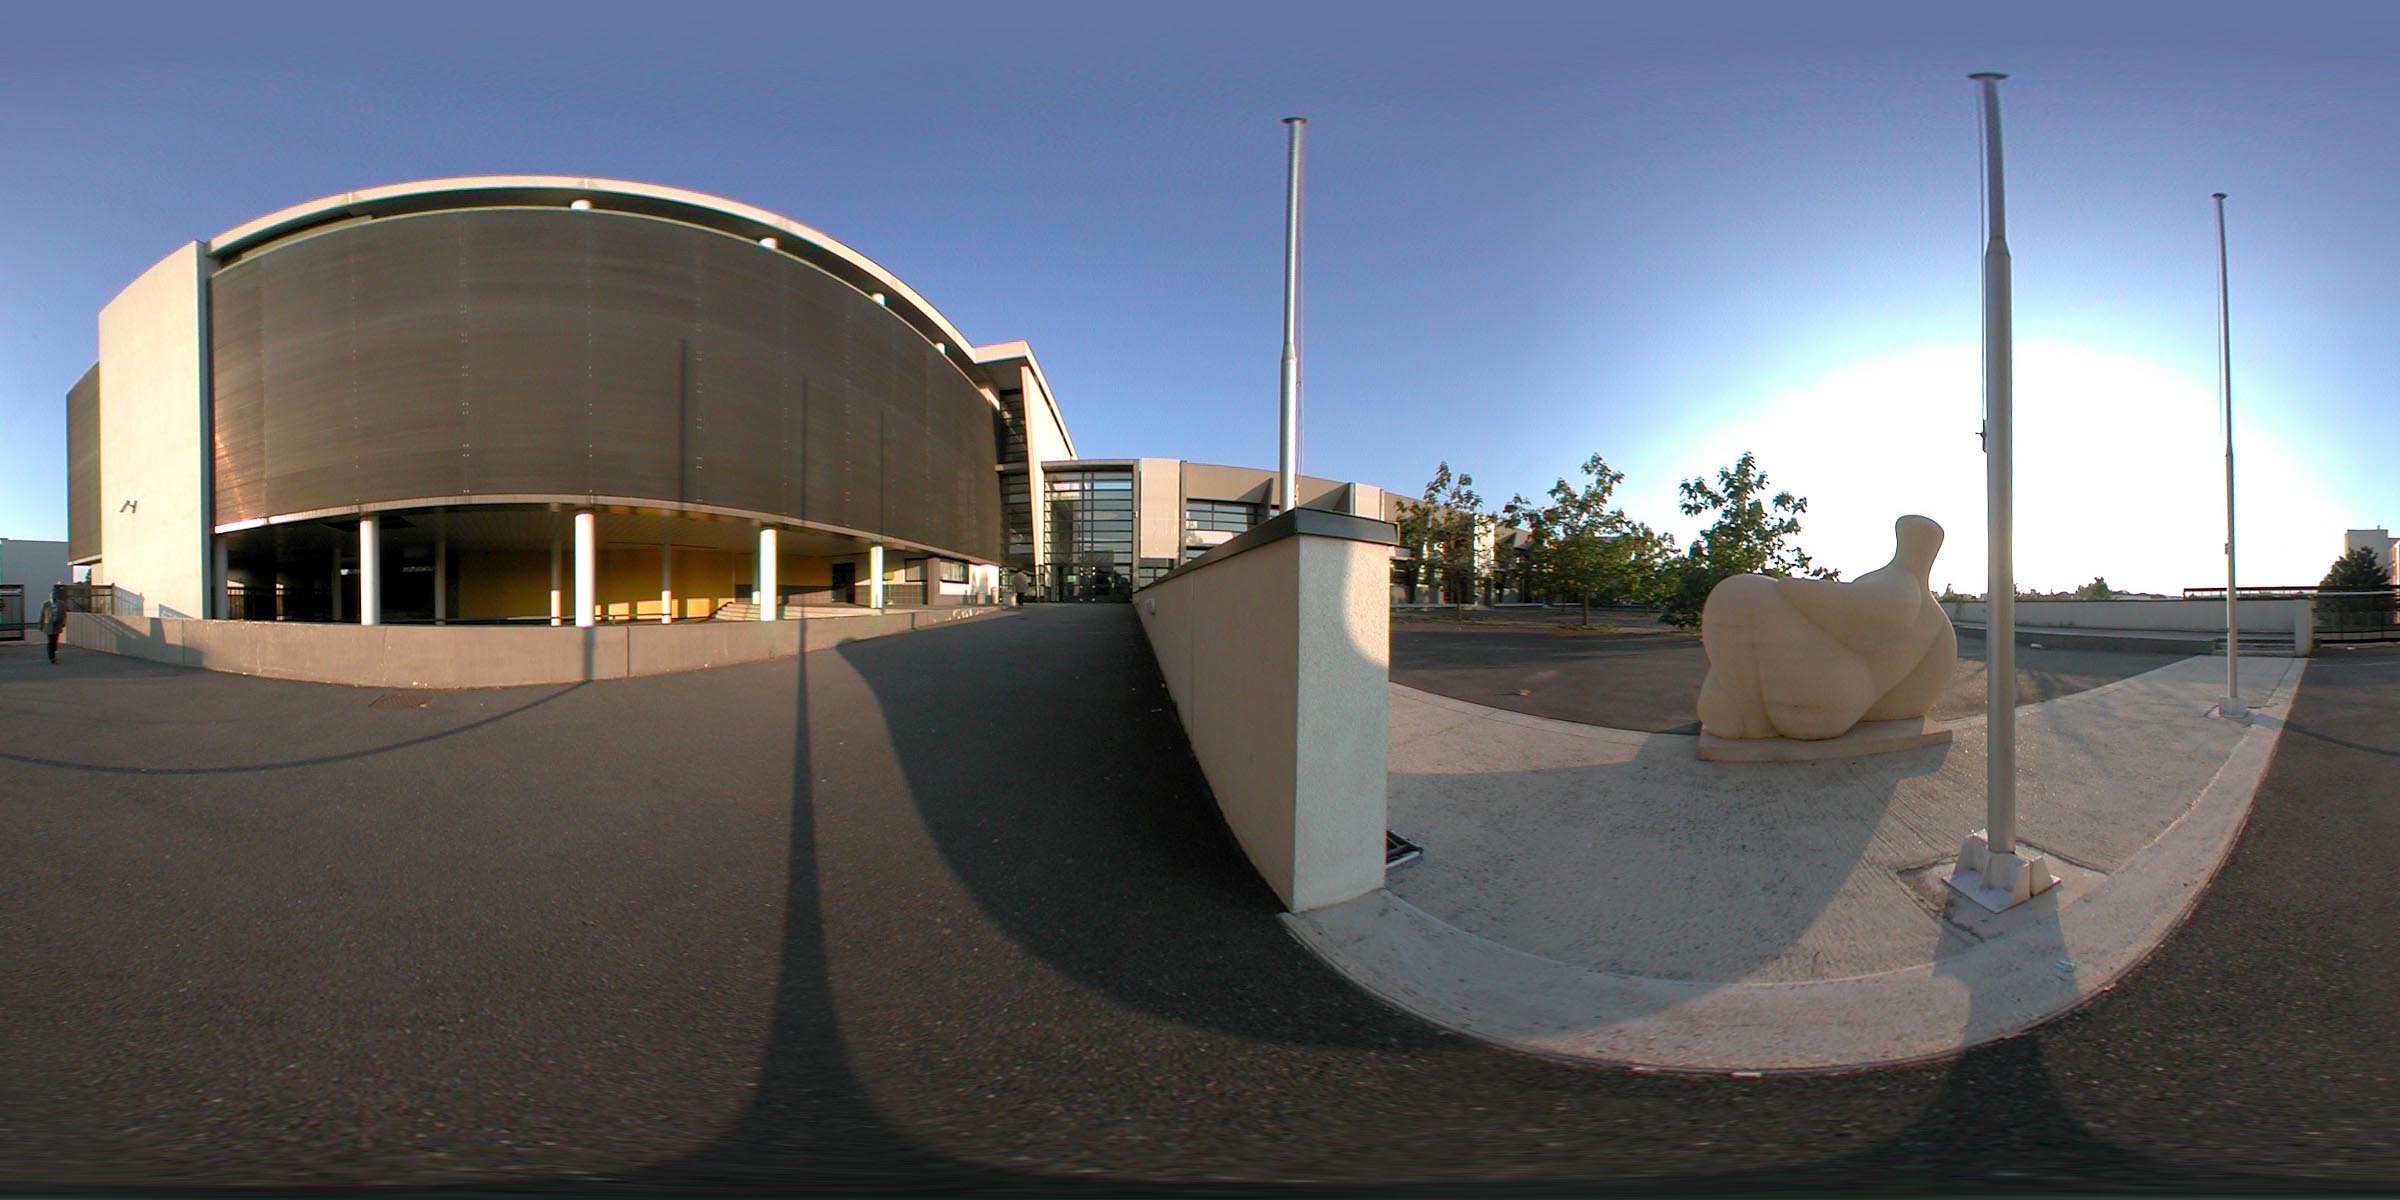
original

after filter
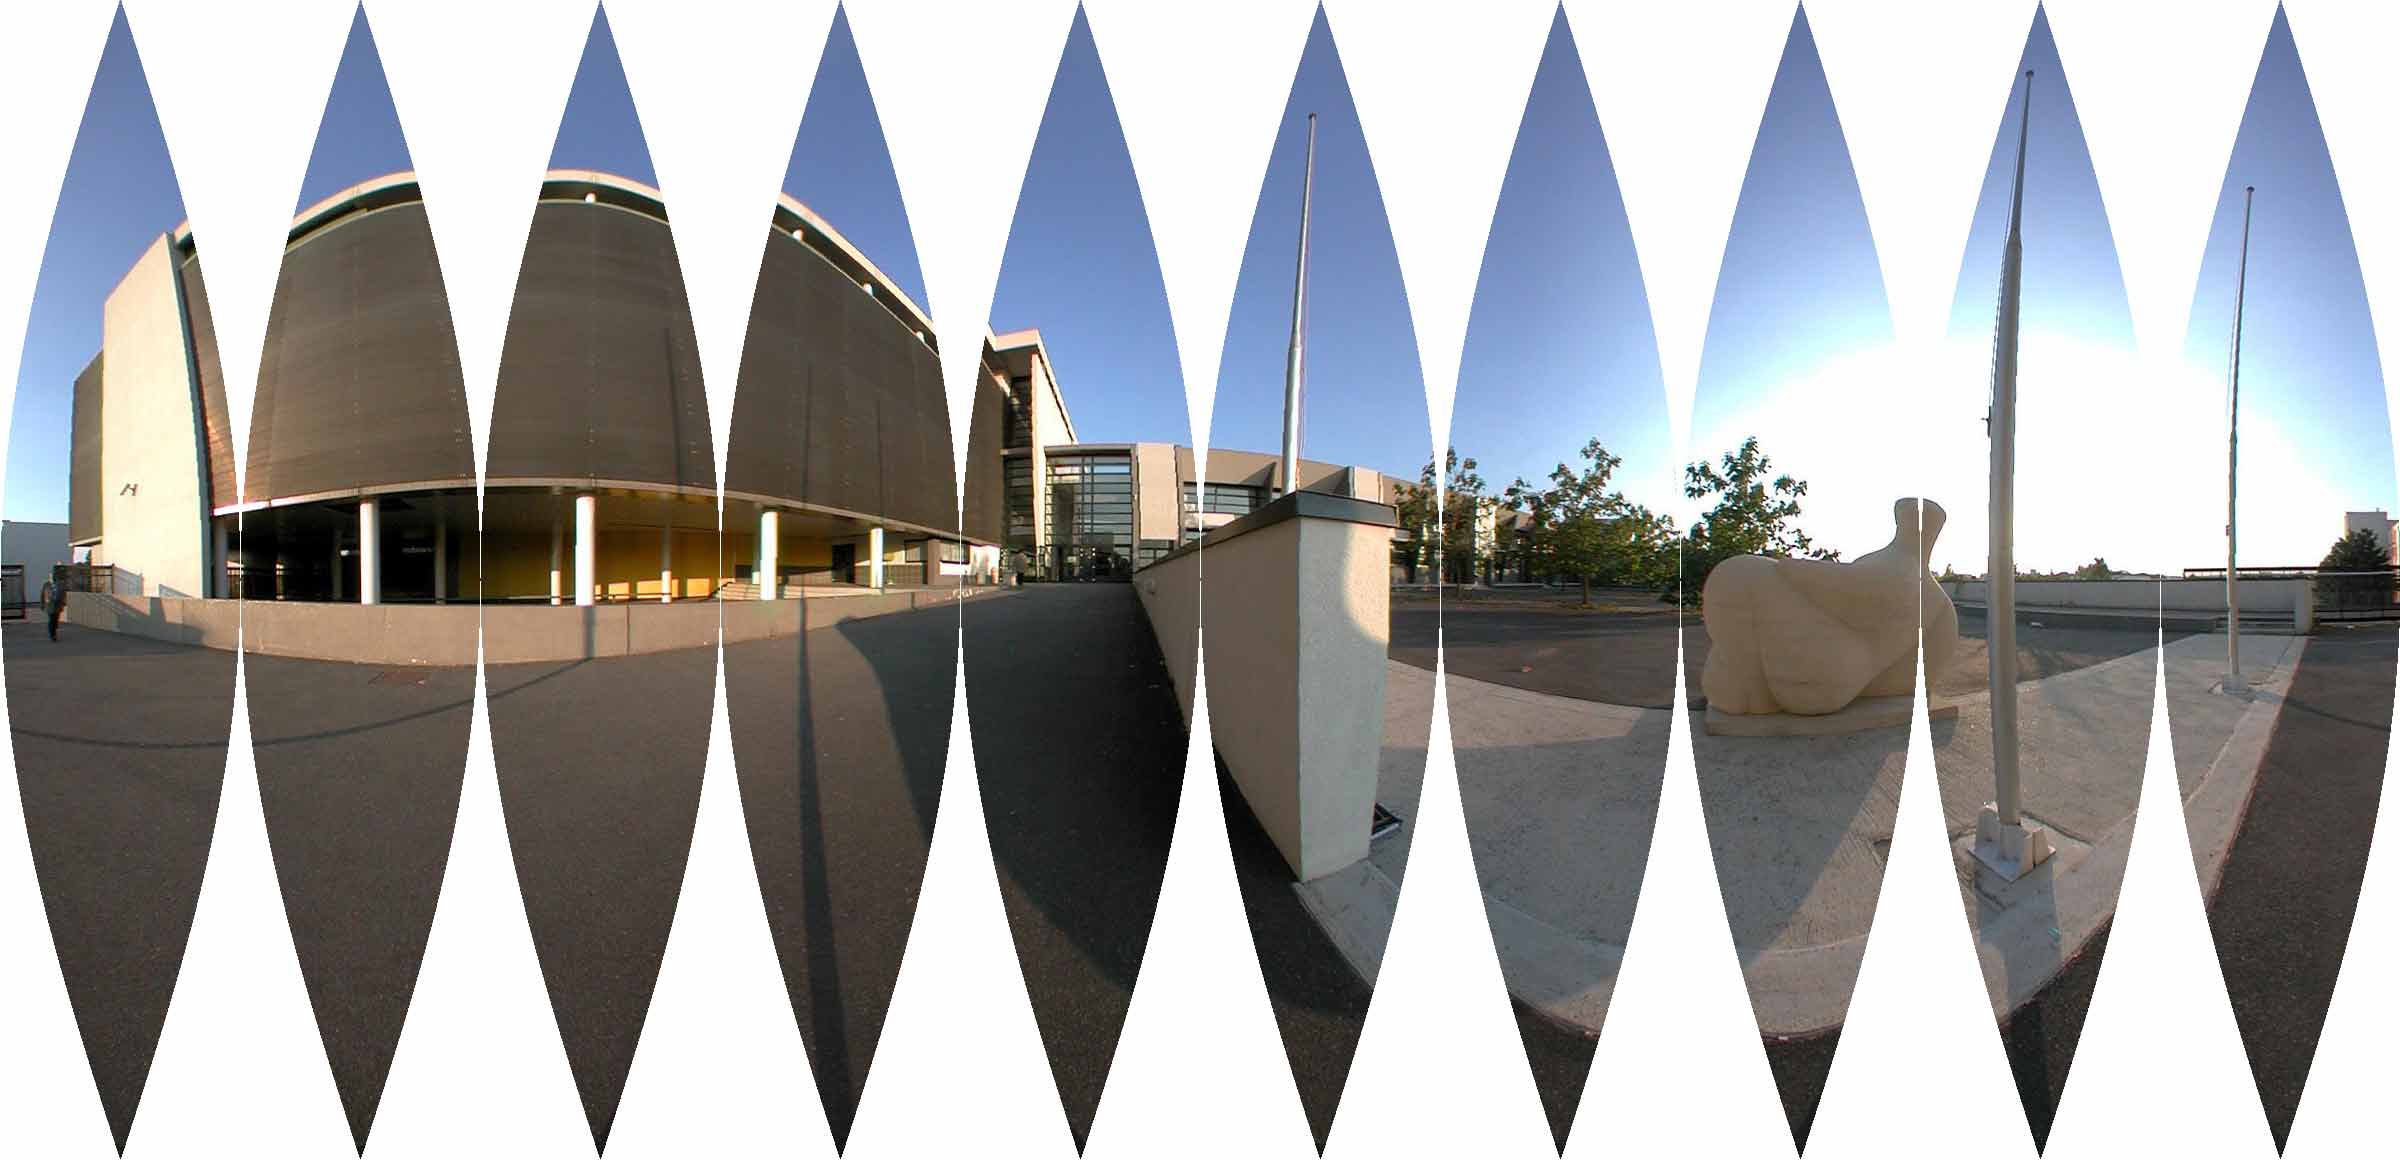
after vertical resize
And see the VR panorama with Java PTviewer or with iMove Plugin
Caveat:
I didn't try to remap the image on each slice from
sphere to horizontal cylinder: the filter would have been much
slower, and the difference is low when the number of slices
is high - the typical use of this filter.
![]()
![]()
![]()
![]()
![]()
![]()
![]()
![]()
![]()
![]()
![]()
![]()
![]()
![]()
![]()