![]()
![]()
![]()
![]()

![]()
![]()
![]()
![]()
![]()
![]()
![]()
![]()
![]()
![]()
![]()
- Autonomy is not outstanding, something to be expected with a low capacity battery - I couldn't find a bigger one fitting. Autonomy would be significantly better with alkaline or NiMH batteries.
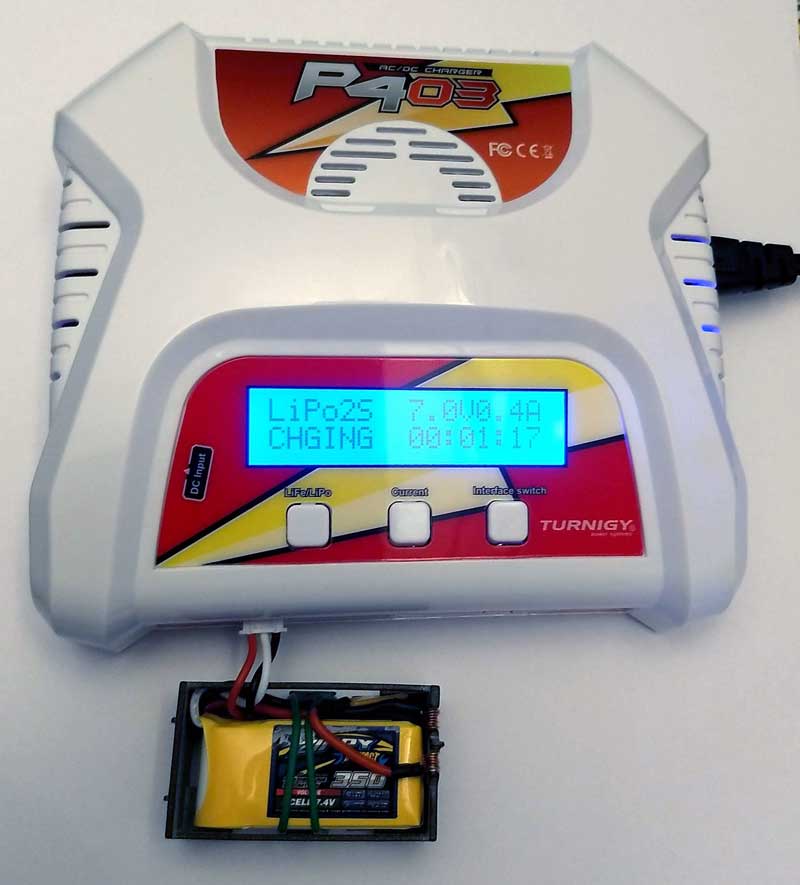
- Charging is easy and fast: just plug the balance connector in the charger port, and wait 1 hour or so.
- Light weight: Powered Up hub weighs 55g with LiPo battery, 109g with alkaline batteries and 113 with NiMH. Control+ hub weighs 105g with LiPo battery, 207g with alkaline batteries and 227 with NiMH.
- Voltage (thus motors maximum speed) is similar to NiMH and lower than fresh alkaline cells. But voltage of alkaline drop rapidly as they discharge (see here).
- Available current is a very strong point of LiPo batteries. If your application needs heavily loaded motors, LiPo is the best. Battery capacity even becomes better than alkaline cells, as available capacity of alkaline cells drops seriously at high drained current.
- Neither the Powered Up hub nor the Control+ one are
able to stop if battery reaches very low levels (LiPo battery
don't like to be discharged under 3V per element (6V here
for 2S configuration). Control+ is has a switch pressed
by a pin in battery box. This switch is supposed to implement
low-level disconnection, but it does nothing with current
firmware. We can expect it to work if/when LEGO sales a
rechargeable battery for Control+ hub. Nonetheless, there
are several warnings that battery level is low:
- Hubs start to blink orange when battery goes below 6V.
- PoweredUp 3.0 app
lacks a bit of subtlety: on connection screen, it reports
battery full over 6V, battery empty below!
Control+ app is significantly better with its gauge showing more or less battery percentage. This gauge blinks red under 6.2V, and apps asks to replace battery under 5.9V. - Motors slow down significantly and lack power
- Some third party apps or programs report directly battery level as a % figure (Brick Controller 2, ControlZ, BAP). Below is a chart showing relationship between reported battery percentage and battery voltage. Try not to go below 20%... Note that the battery fully charged threshold (7.6V) is not very well adapted for LiPo or alkaline cells. At 7.6V a 2S LiPo battery only has half of its capacity, and alkaline is seriously discharged (1.27V per cell).
- Read carefully the documentation provided by your battery and charger supplier. Remember, if handled roughly a LiPo battery can take fire!
- Never recharge LiPo battery over 4.2V per cell (8.4V for 2S battery).
- Never over-discharge the battery. As noted above, signs of discharged batteries are blinking orange hub, battery level under 20% or motors slow down.
- For best battery life, don't keep your LiPo batteries discharged or fully charged. Ideal shelf storage battery level is around 1/3 of full charge. This means about 7.4V for the 2S battery, or 90% of reported battery level.
- Safe charging current is about 1C (1 hour charge). This
means that if battery capacity is 350mAH, charging current
should be about 350mA.
LiPo batteries
for Powered Up and Control+ hubs
These batteries are the result of my desire
to experiment with two technologies, LiPo batteries and 3D printing...
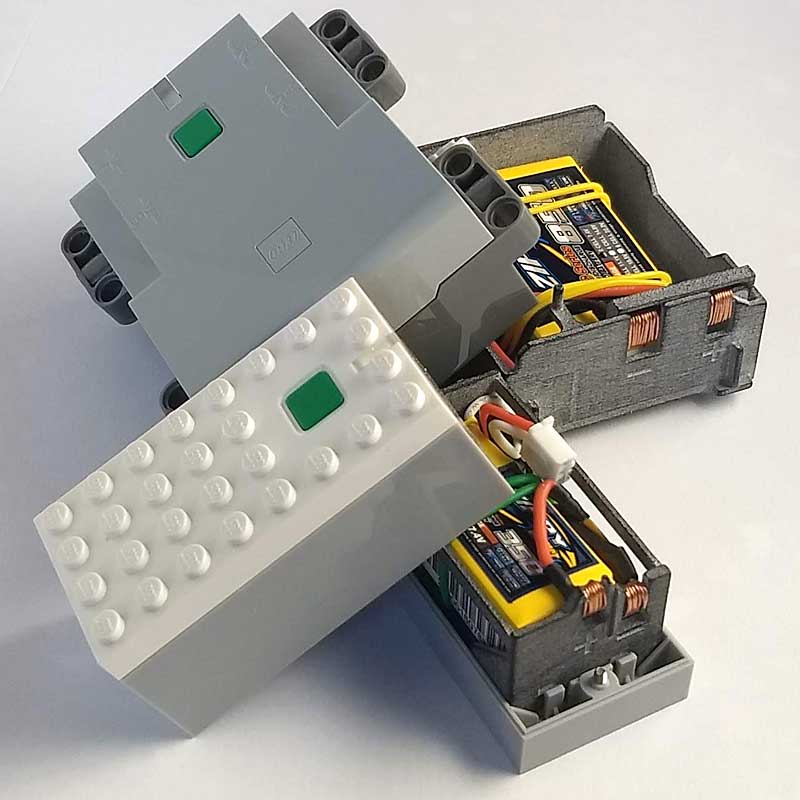
A nice thing with Powered Up and Control+ hubs is that they
contain a removable cradle to hold the alkaline batteries. This
holder is easy to replace with a 3D printed one containing a
LiPo battery.
Warning: Read carefully battery and charger manuals before use. If you want to build your own battery, do it at your own risk and only if you know what you are doing!!! |
Battery choice, protection, charger...
The battery voltage is the first design choice. Both hubs are normally powered from 6 x 1.5V alkaline batteries, providing a nominal 9V voltage. LiPo battery cells have a nominal 3.7V voltage that can reach 4.2V just after charging. Of course I considered the possibility to use 3 cells in series but the voltage is clearly too high for the hubs: the motor driver IC (LB1836M) is directly powered from battery voltage, and its absolute maximum rating is a mere 10.5V. So I'll stick with a 2 cells, wired in series configuration (2S). Make sure to chose batteries equipped with a balance port. This allows the charger to access each cell separately and avoid charge unbalance with one battery charging too much and the other not enough. Moreover, it provides a separate connector for charging.
Unfortunately, the battery cradle has very accessible electric contacts, so inadvertent shorting of battery is definitely a possibility. To prevent any damage (fire), a protection is thus needed. I resorted to resettable fuses with a rating high enough to never trip in normal usage, but limiting current to a low, safe value is the battery is accidentally shorted.
Along with the batteries, I also bought a LiPo battery charger. I chose a Turnigy P403 LiPoly / LiFe AC/DC Battery Charger that I bought from HobbyKing. This charger can be programmed to adapt charging current to the battery (safe rating is the mAH rating ( C-rating) of the battery, resulting in a full recharge in an hour or so). This charger has two 2S ports, so two (identical) batteries can be charged at the same time. The battery is charged using the 3-wire balancing port of the battery.
3-D printing of battery cradle
As I don't own a 3D printer, I used a 3D printing service. I chose a French shop, Sculpteo, but other similar services (eg. Shapeways) are available worldwide. My boxes were printed using HP Jetfusion, but the parts have few critical dimensions, so many printing technologies should work fine. Including your own 3D-printer ;)
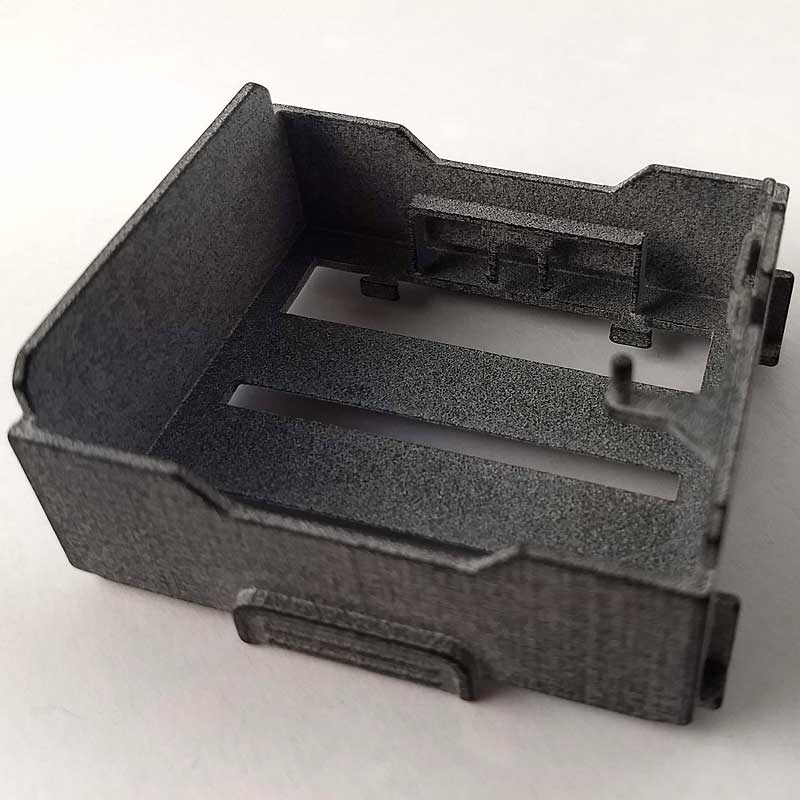
Powered Up battery construction
|
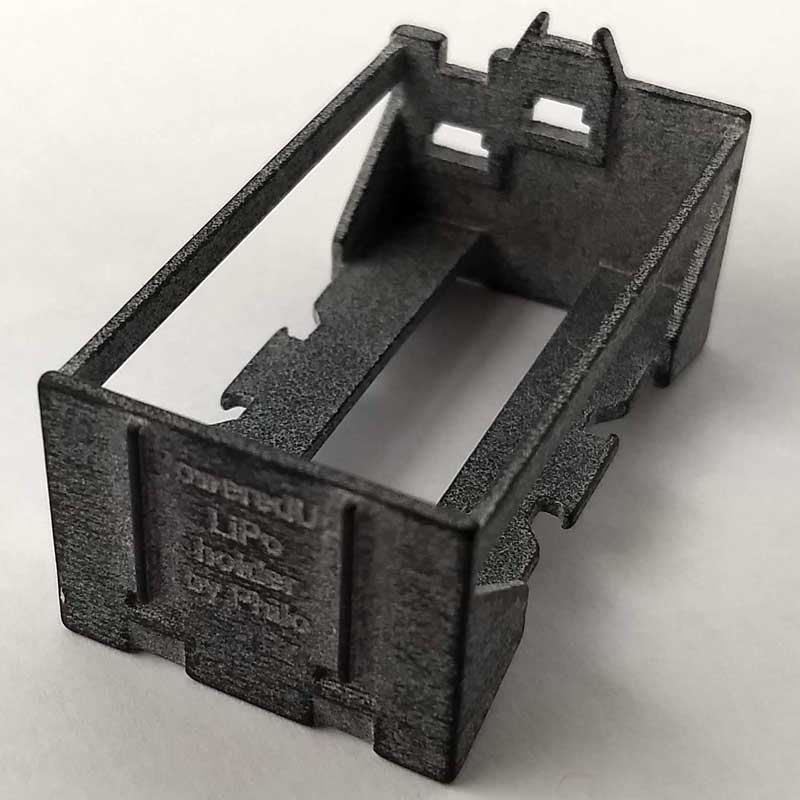
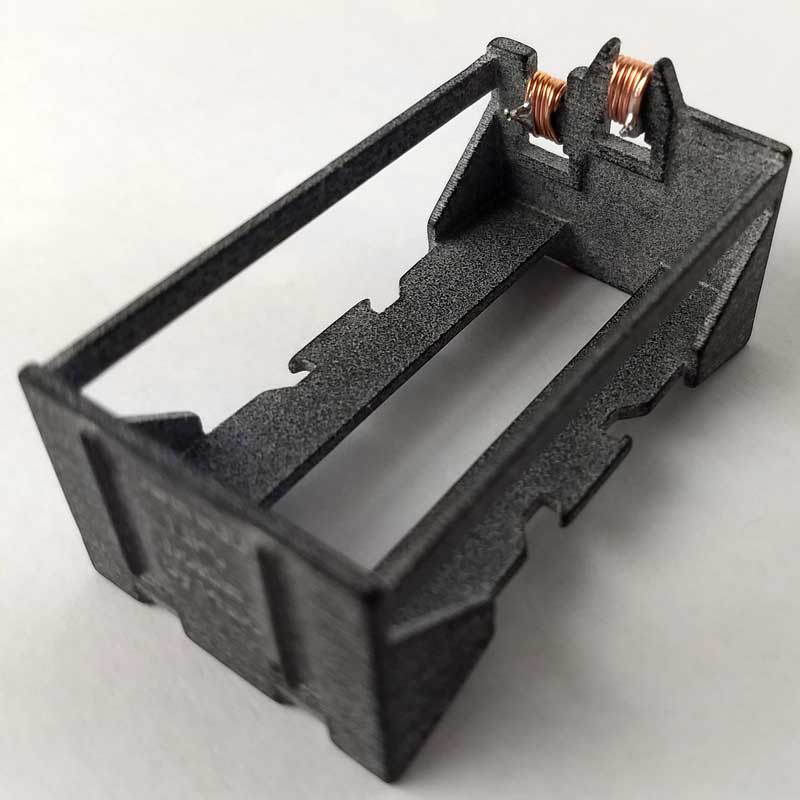
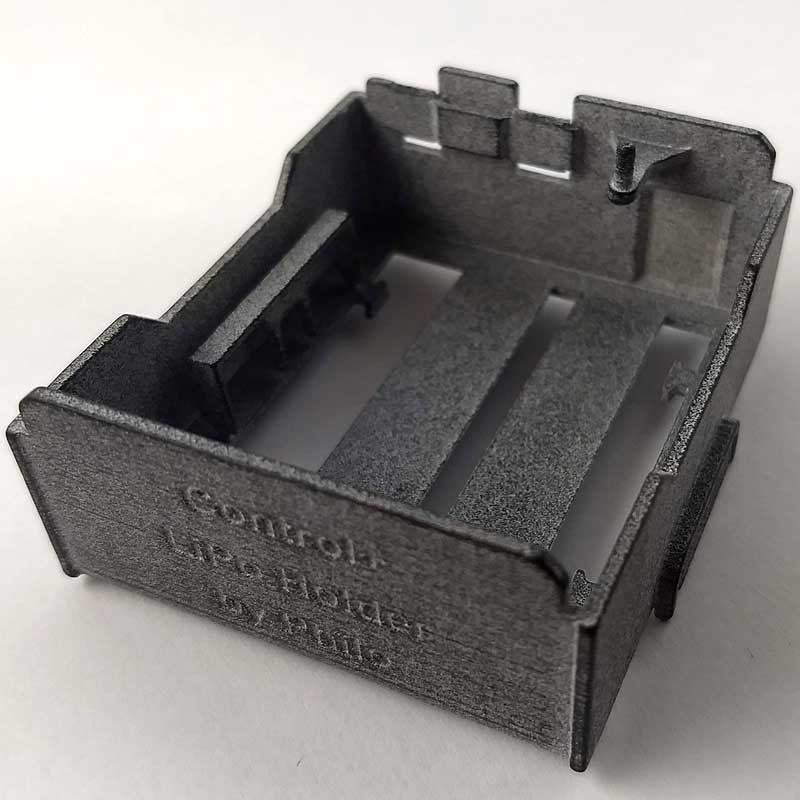
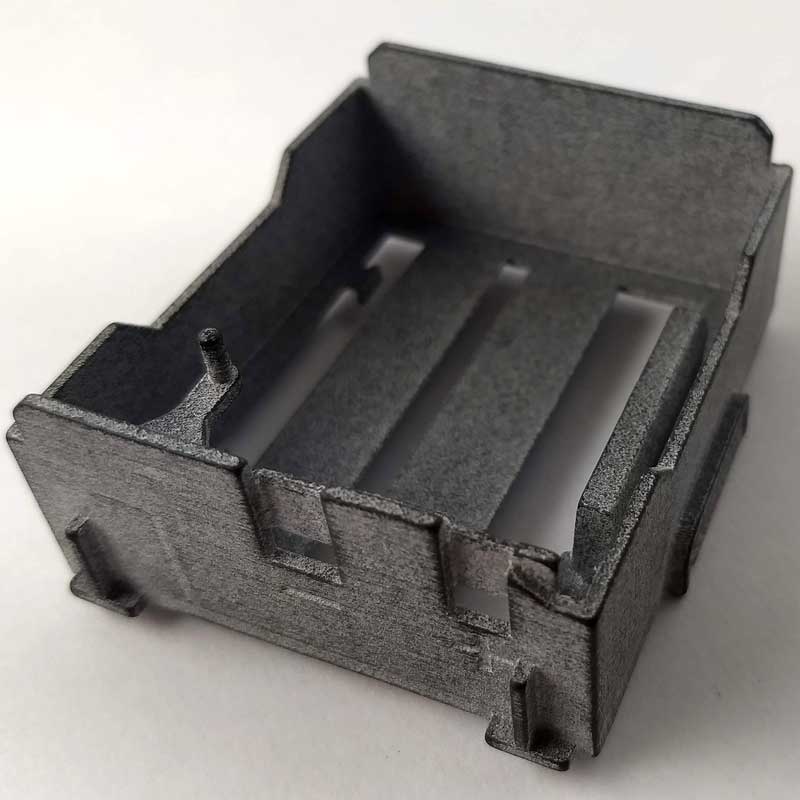
The 3D printed battery holder. Download the .STL 3D file here. Unit price I paid: 6.60 + VAT. |
|
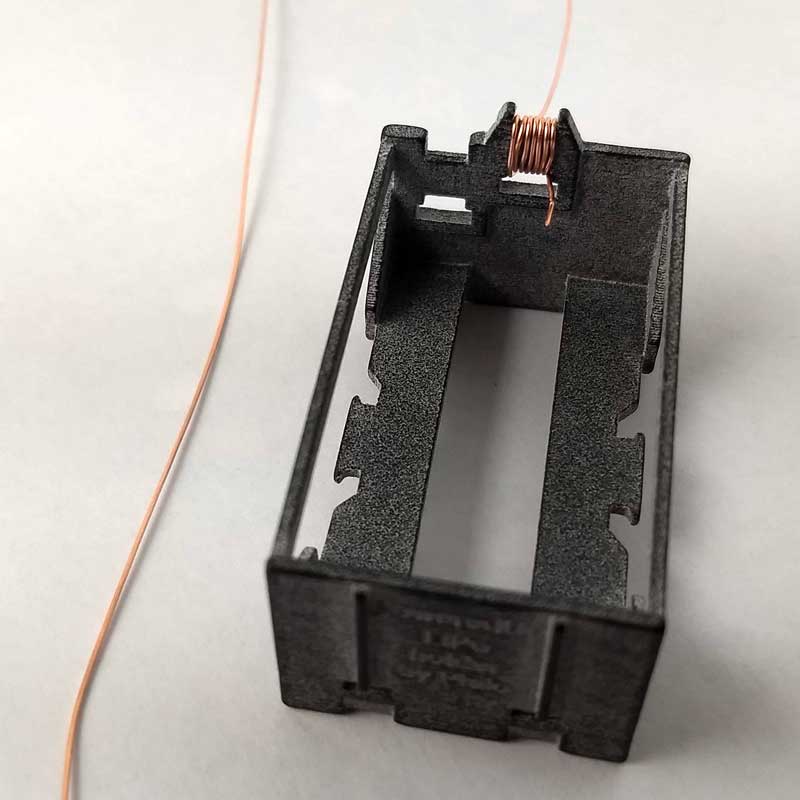
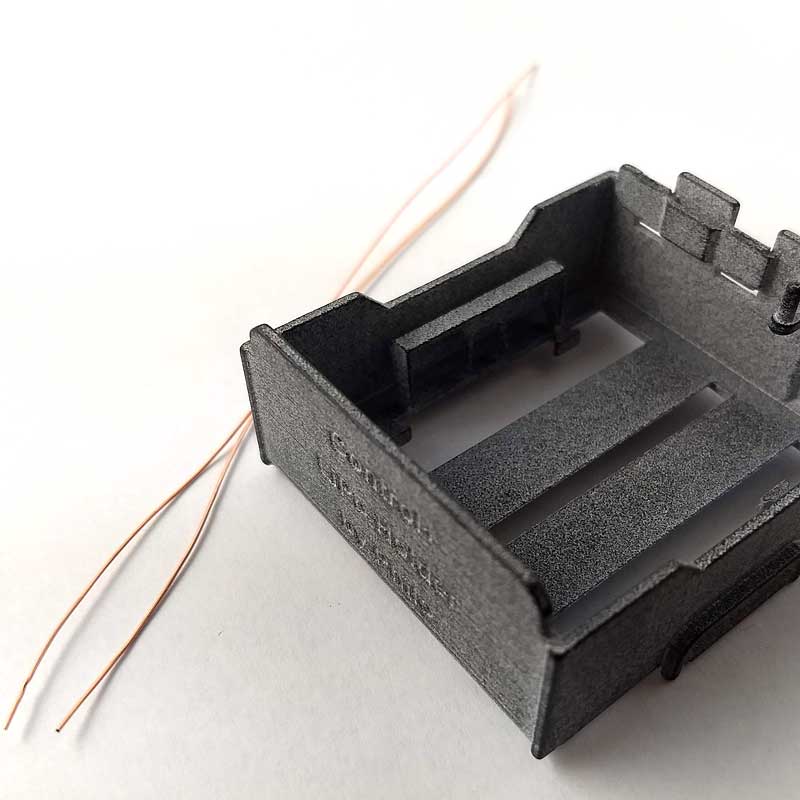
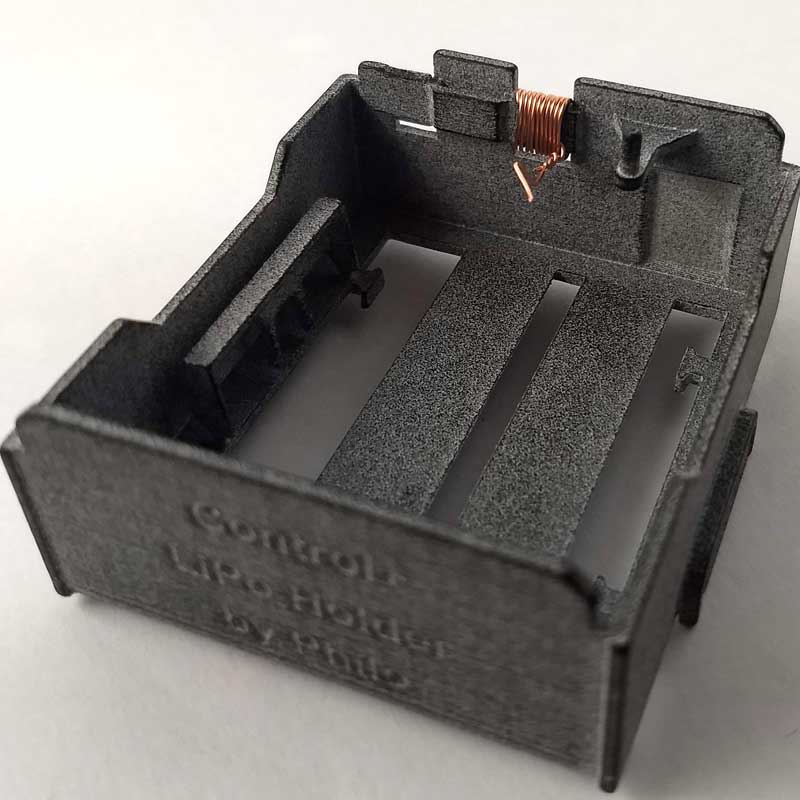
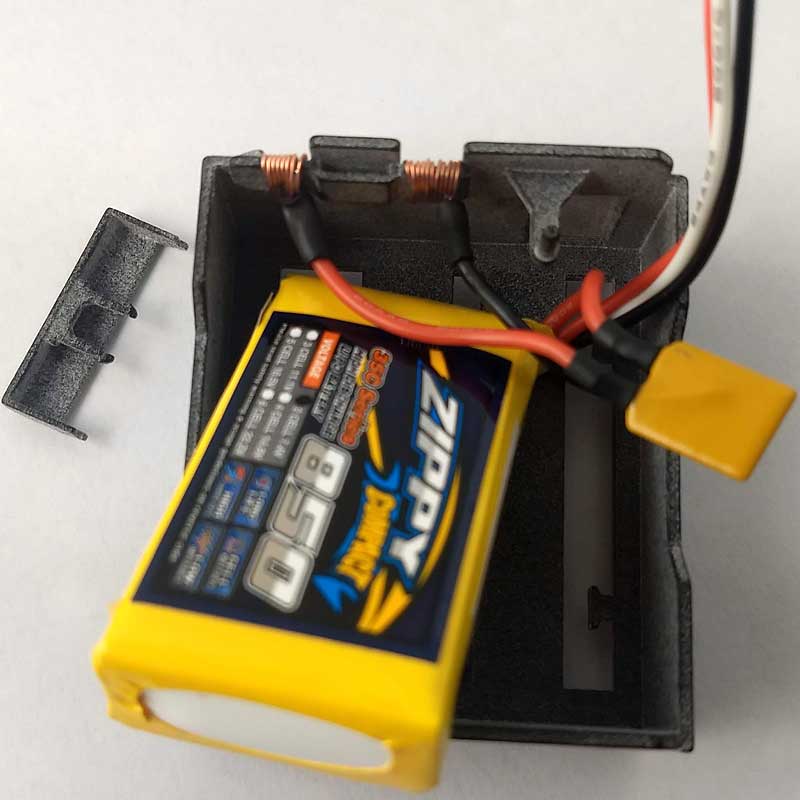
The electrical contacts are made of thin copper wire wound around the contact bars. Wire comes from telephone installation cables (0.5mm diameter/24AWG). About 20cm of copper wire is needed for each contact. When you are done winding, twist the wire ends, cut the excess wire and secure with a solder. Take care while soldering the wires, plastic (especially the PLA of your 3D printer) melts easily! |
|
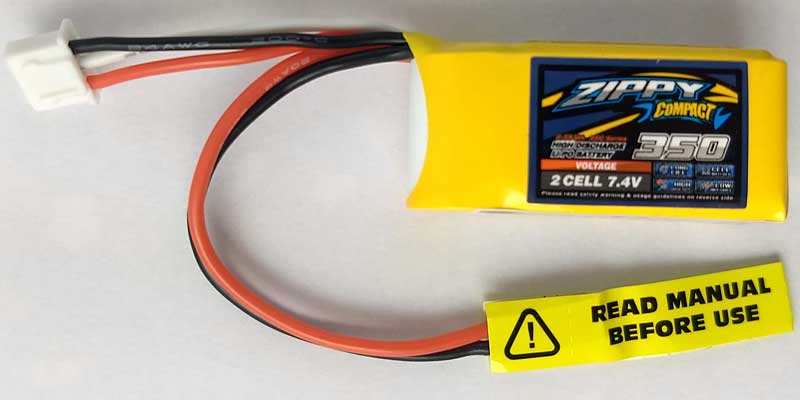
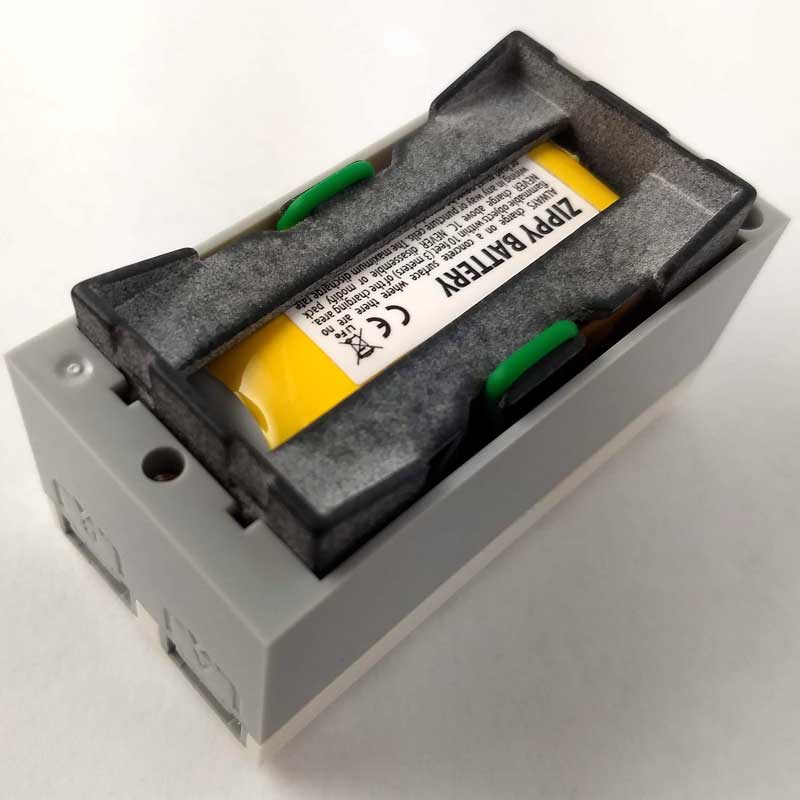
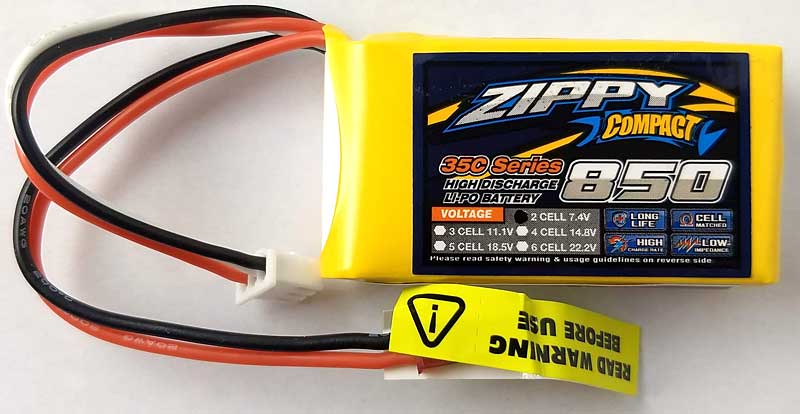
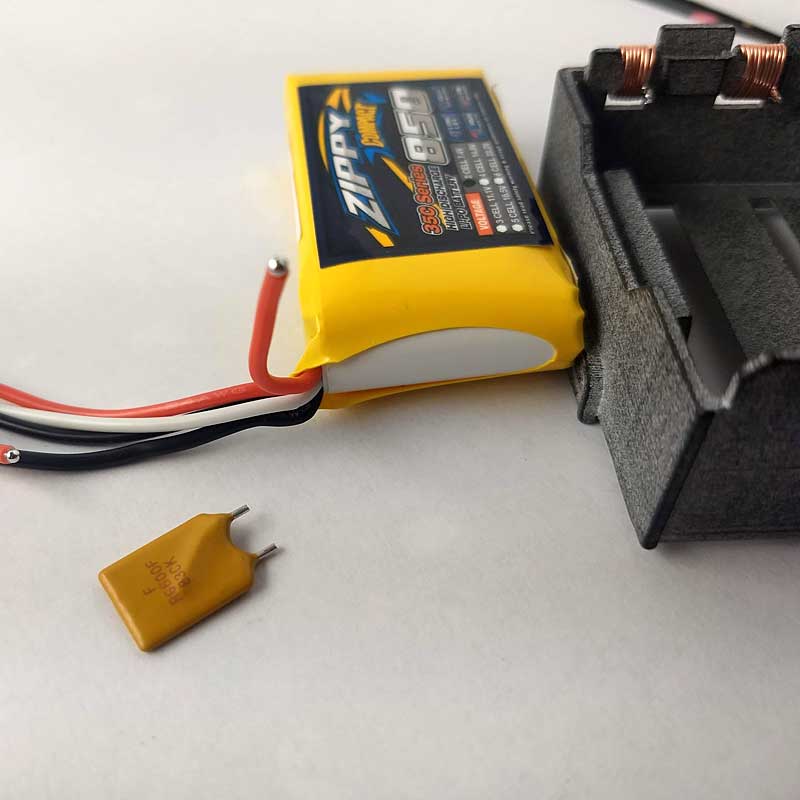
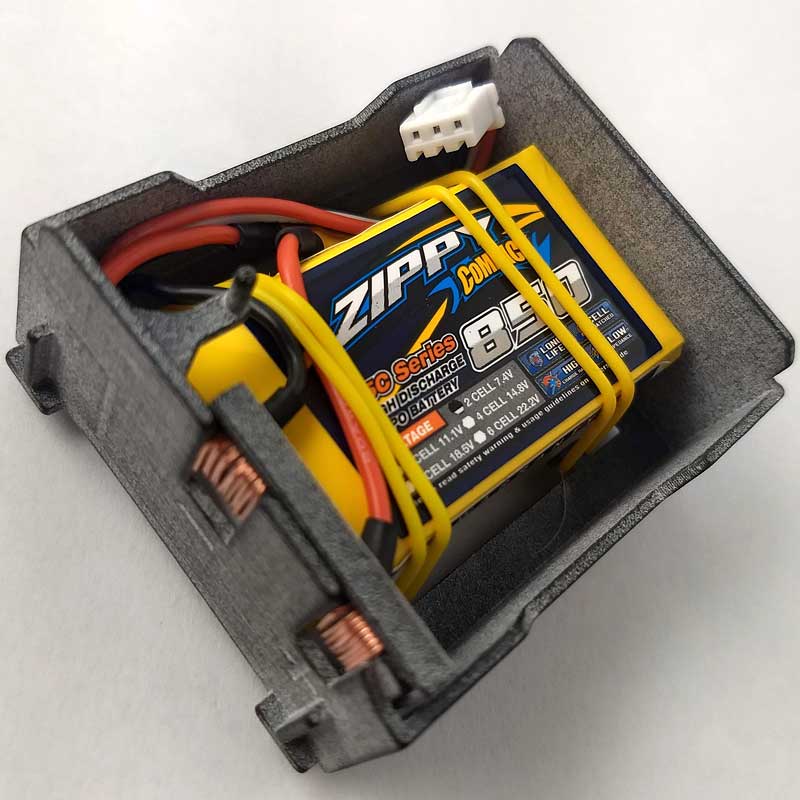
Of course you want to use the highest capacity battery that fits the enclosure. I found that the limiting factor is the length of the battery. The "Zippy Compact" ones were the shortest I could find. They have a 350mAH capacity. This is not outstanding, but it provides 2:30 hours of continuous work in realistic conditions (see below). I paid them 4.05 from HobbyKing shop. |
|
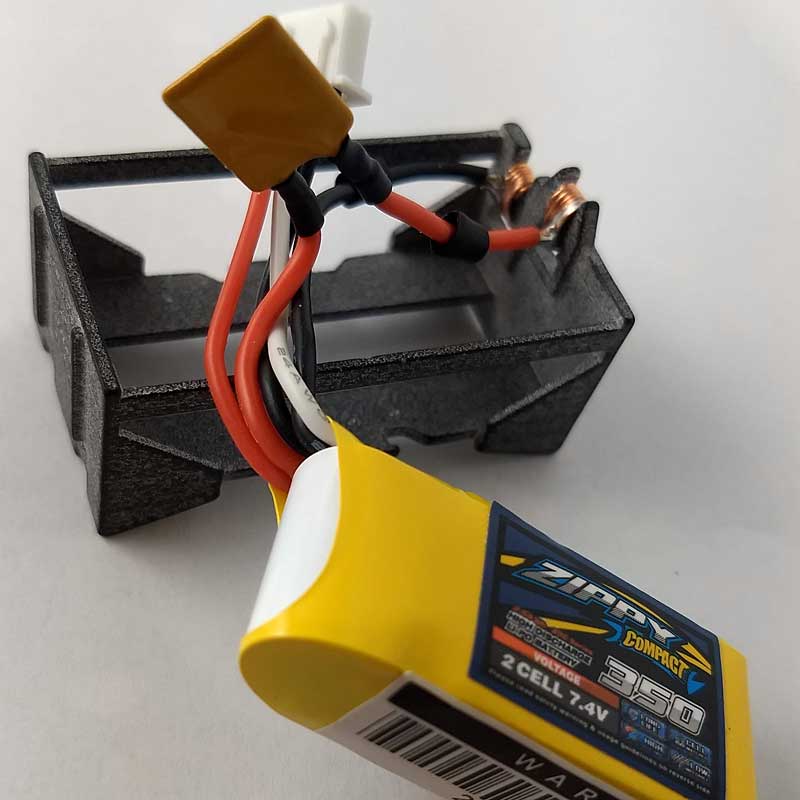
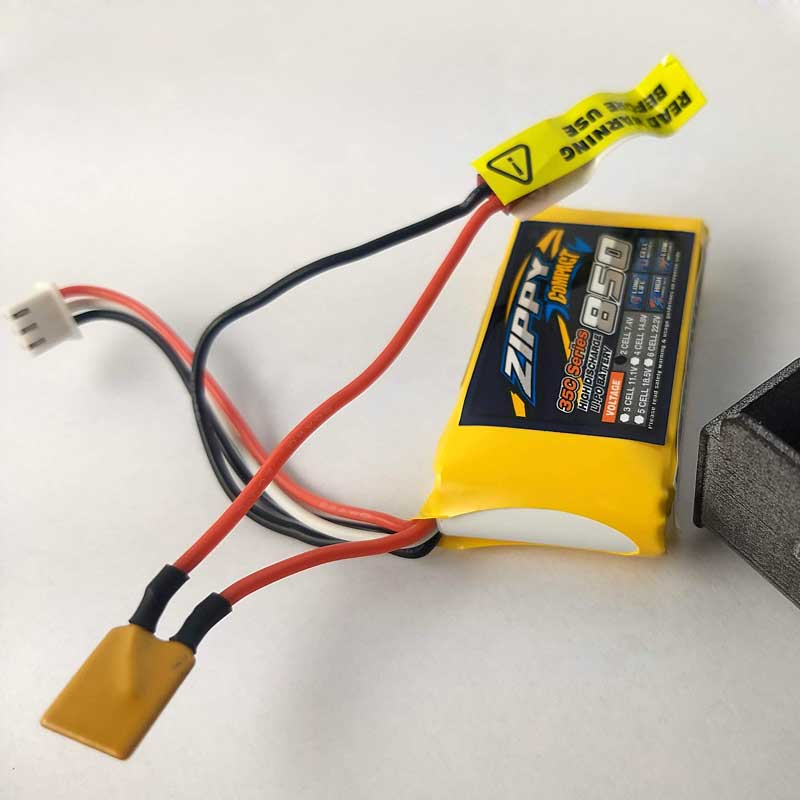
The first thing to do is to insert a resettable fuse in series with the positive lead (red one) to prevent damages in case of accidental shorting. I used a 3A continuous rated one, value high enough to never trip in normal use, but that efficiently protects the battery: it trips at 5.1A, a lower value than max battery current (20C = 20 x 0.35 = 7A). Solders are protected with small pieces of heat-shrink tubing. Then the battery output wires are cut to length and soldered to holder contacts. Again, use heat-shrink tubing over solders. Take care of polarity! Red positive wire is to be connected to the middle contact, marked "+" on the battery holder, black one to the "-" contact. |
|
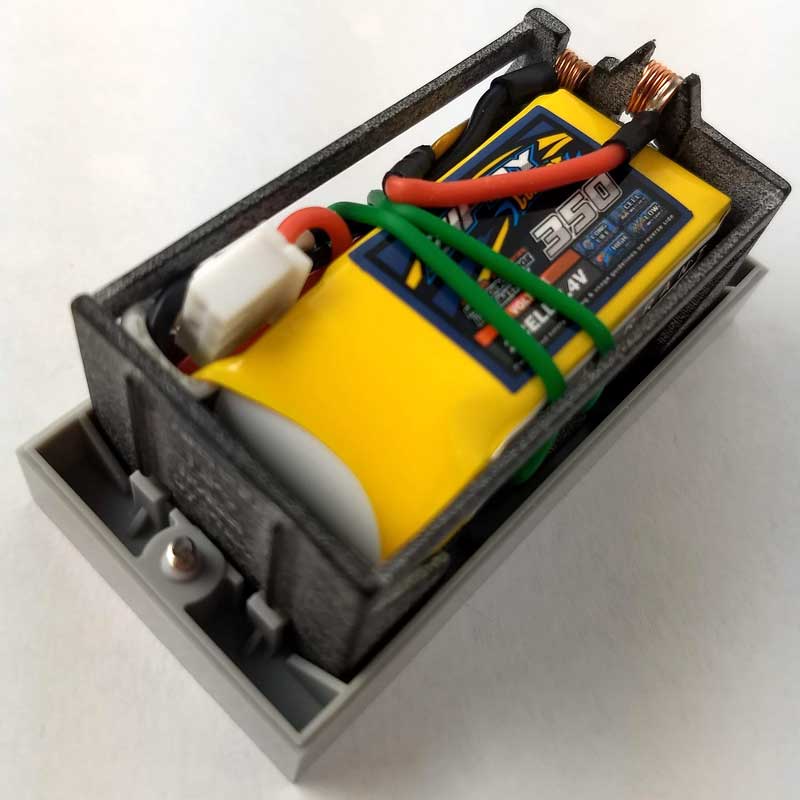
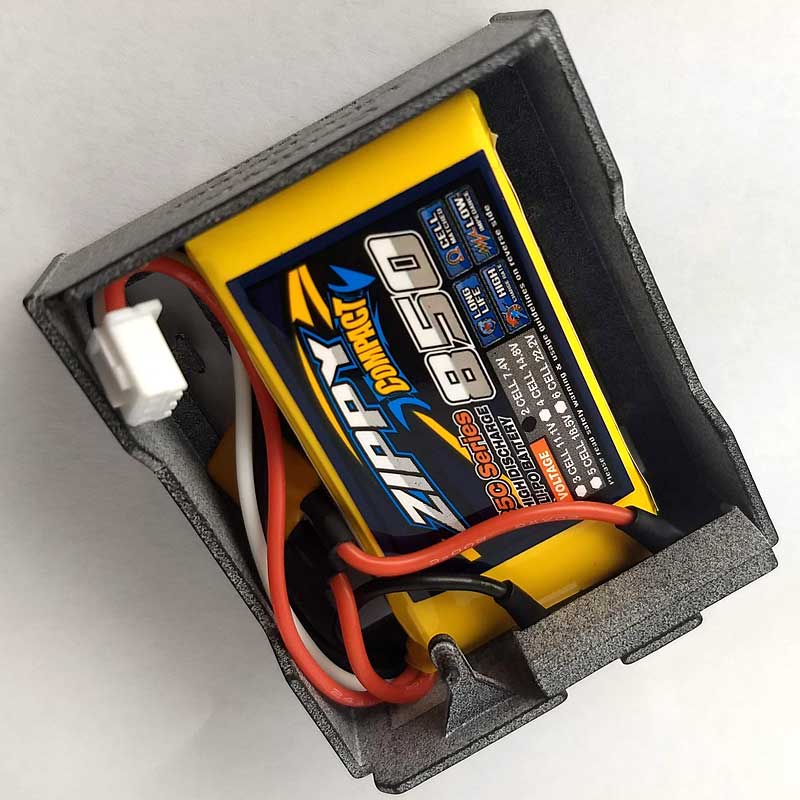
The battery is then inserted in the cradle and secured with a rubber band. I used a LEGO silicon one, as they are not subject to ageing. As you can see, the battery holder fits perfectly the Powered Up hub. |


Powered Up battery construction
|
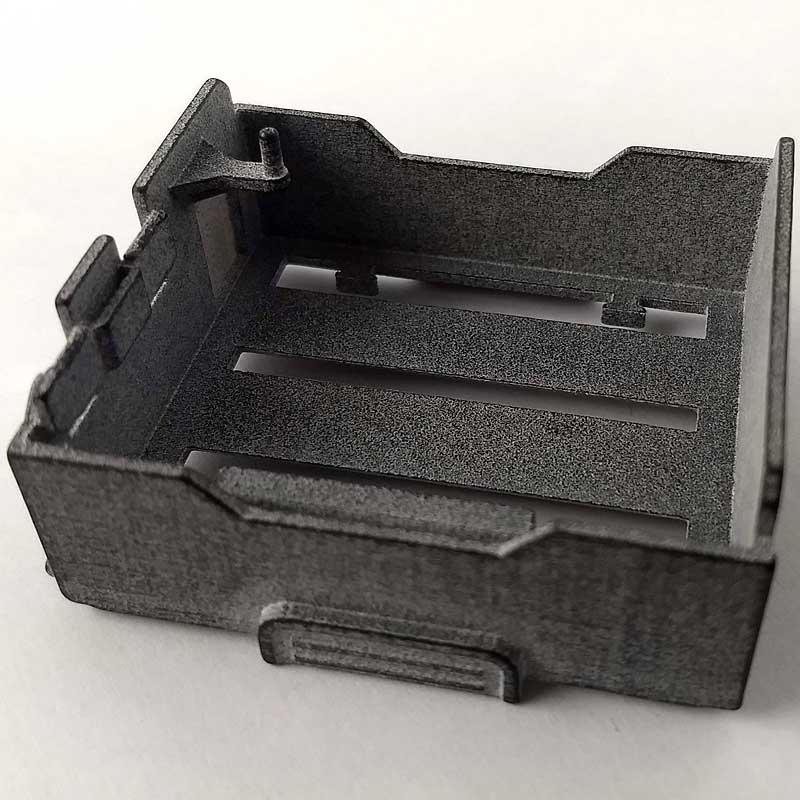
The 3D printed battery holder. Download the .STL 3D file here. Unit price I paid: 12.60 + VAT. |
|
The electrical contacts are made of thin copper wire wound around the contact bars. Wire comes from telephone installation cables (0.5mm diameter/24AWG). About 25cm of copper wire is needed for each contact. When you are done winding, twist the wire ends, cut the excess wire and secure with a solder. Take care while soldering the wires, plastic (especially the PLA of your 3D printer) melts easily! |
|
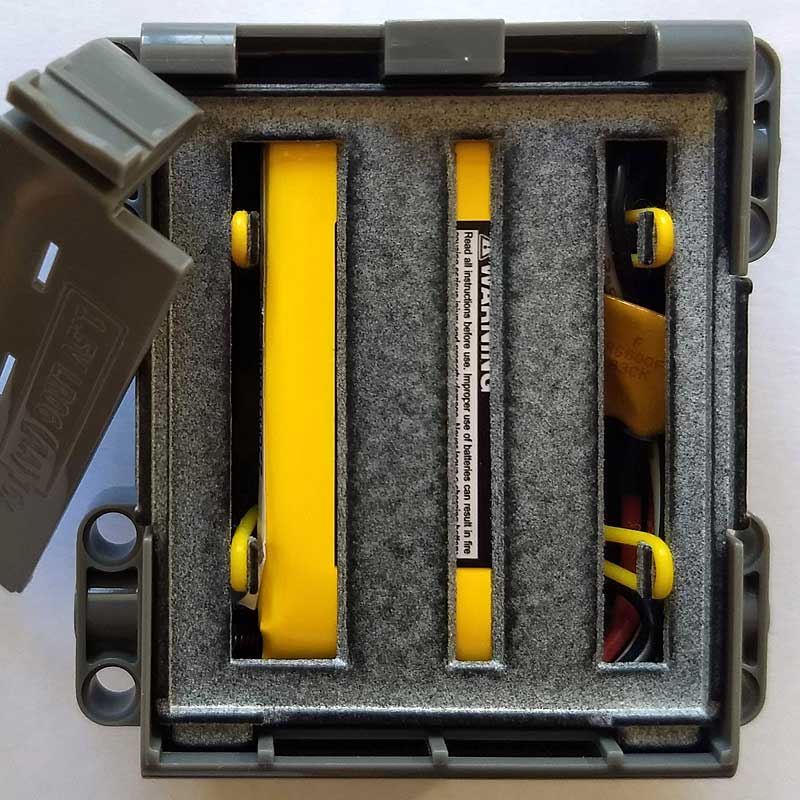
Of course you want to use the highest capacity battery that fits the enclosure. Again, the limiting factor is the length of the battery... The "Zippy Compact" ones were the shortest I could find. They have a 850mAH capacity. This is not outstanding, but it provides 2 hours of continuous work in realistic conditions (see below). I used the 35C (30A) version that I paid them 6.73 from HobbyKing shop. The cheaper 25C (21A) version would have been fine too, but it was not available when I bought them. |
|
The first thing to do is to insert a resettable fuse in series with the positive lead (red one) to prevent damages in case of accidental shorting. I used a 6A continuous rated one, value high enough to never trip in normal use, but that efficiently protects the battery: it trips at 10.2A, a lower value than max battery current (20C = 20 x 0.85 = 21A). Solders are protected with small pieces of heat-shrink tubing. |
|
Then the battery output wires are cut to length and soldered to holder contacts. Again, use heat-shrink tubing over solders. Take care of polarity! Red positive wire is to be connected to the side contact, marked "+" on the battery holder, black one to the "-" contact. The battery is then inserted in the cradle. I added a little lid detachable from bottom of box to cover and protect inside of contacts. This lid is inserted in the slit between the contacts. Probably not the most useful, but was fun to create... |
|
The battery is secured with two rubber band. I used LEGO silicon ones, as they are not subject to ageing. As you can see, the battery holder fits perfectly the Control+ hub. |
Autonomy
|
During a Powered Up test I hope to be realistic, the LiPo battery powered a train continuously during 2:30 hours. The train is not long, but it caries the weight of the controller measuring battery voltage. There is a small slope on the left to increase effort on the motor. A Wedo distance sensor detects the white plate in front, the train stops for 5 seconds after each loop to allow easy reading of battery voltage. All this is controlled using the Brick Automation Project software. |
|
The discharge curve of the Powered Up battery during train test. |
|
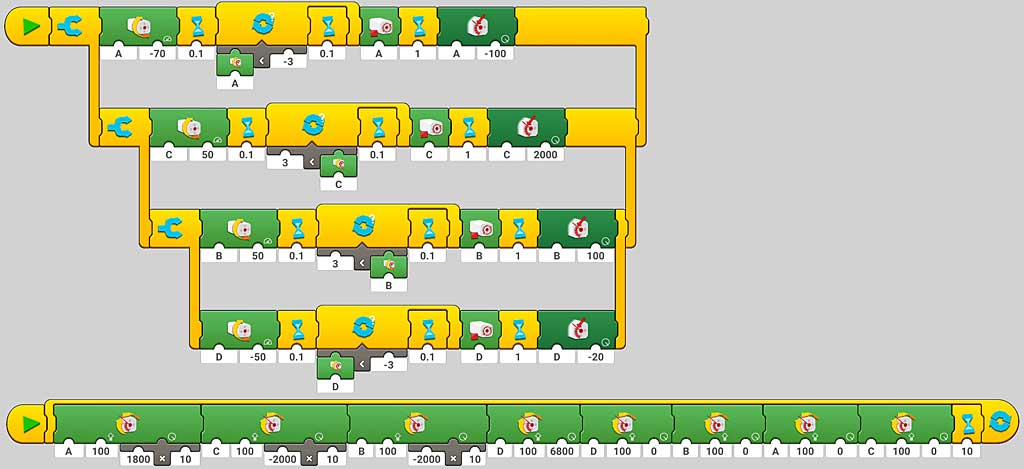
The Control+ battery was tested with a program written using Powered Up app to exercise the arm of 42100 set (Liebherr R9800). Top sequence sets all the arm motors in a known initial position. The second sequence moves all motors back and forth, ending in the same initial position. This sequence last about 2 minutes, after which a 10 seconds pause allows to read battery voltage. The autonomy reached a bit more than 2 hours. |
|
The discharge curve of the Control+ battery during Liebherr arm test. |

Performances,
benefits and drawbacks
Battery care
![]()
![]()
![]()
![]()
![]()
![]()
![]()
![]()
![]()
![]()
![]()
![]()
![]()
![]()
![]()